“All that noise, noise, noise” can turn anyone into a Grinch! No matter where you live or work, noise is often an unwelcome visitor. There are other options than ripping open the walls and rebuilding them to control sound. Rebuilds are expensive and messy and not what most homeowners want, and if you rent it’s usually not an option. Soundproofing interior walls is one way to reduce sound intrusion and doesn’t require removing the existing drywall. There are different ways to soundproof walls without rebuilding them.
Consider one or more of these popular, inexpensive yet effective ways for soundproofing existing walls:
- Sound Blanket
- Noise Reducing Curtains
- Absorbing Fabrics
- Soundproof Paint
- Soundproof Wallpaper
- Furniture Placement
- Foam Wall Panels
- Acoustic Fabric Panels
- Sealing Perimeter Cracks, Gaps & Outlets
To assist you in choosing the best option for reducing airborne and structure-borne noise, we’ll discuss how to soundproof an existing wall using different popular methods. We’ll also take a look at some more expensive and effective ways to control disruptive noise. Additionally, we’ll explain how to soundproof a brick wall. Hopefully, we’ll help you find a solution for your disruptive noises.

Contents (Jump to Topic)
What You Need to Know Before You Begin Soundproofing
Sound penetrates walls and windows in much the same way air does, in fact, wherever air sneaks in, so will sound. However, soundwaves can also pass through wall structures that are poor sound barriers. Walls need to block, reflect, decouple, trap and absorb soundwaves to effectively decrease sound transfer. Most exterior walls do some of those things, while most interior walls do little.
Acronyms and ratings are important to know when soundproofing. The International Building Code (IBC) is the foundation for most building codes and recommends the minimum Sound Transmission Class (STC) rating for ceilings, walls, and floors to be 50 – the higher the better. It further recommends bedrooms have a minimum rating of 52, and bathrooms, living rooms, and kitchens are at least 56. Most standard 2×4 interior walls with 1/2″ drywall on both sides only have an STC of 33 or 34.
Noise Reduction Coefficient (NRC), Impact Isolation Class (IIC), Transmission Loss (TL), and Outdoor-Indoor Transmission Class (OITC) are also part of soundproofing lingo. NRC identifies the average sound absorbency of material over four frequencies, with 0 being poor and 1.00 or greater being best. The IIC identifies how well the different materials that make up a floor control impact sound transfer, 50 is OK but the greater the value the better.
Transmission Loss (TL) ties with the STC and identifies the difference between the noise on one side of a wall and what comes through the other. OITC is similar to STC but addresses lower frequencies such as those produced by trucks, trains, planes, and even lawnmowers. It’s used to rate windows and doors, with higher numbers being better.
The amount and type of noises that disrupt varies with individual and location, and even depends on the activity. Disruptive sounds when you’re sitting reading, working, or trying to sleep often differ from sounds that disturb watching TV or kids playing. Airborne noises wafting through cracks and crevasses, open doors and windows, or ductwork are also different from structure-borne noise that radiates from HVAC, plumbing, footsteps, drops, and bounces inside the building or that vibrate through walls.
An ordinary conversation produces around 60dB of ambient noise and cars on the street or a vacuum 70dB. That 10dB may not seem like much numerically, but it translates into double the noise we perceive; every 10dB noise increases, the perceived noise level doubles. So, a quiet room at 20dB is 16-times quieter than that 60dB conversation, while the band practicing in the basement can generate 110dB or 32-times that produced by a conversation and a whopping 512-times more than that quiet room.
Understanding where the noise comes from and how much it needs to be reduced are the main considerations when quieting a room, and differ from person and place. Once those are determined, it helps focus the energy and resources to achieve the desired noise level. If you want a quiet 20dB bedroom and you live next to a freeway, flight-path, or rail line, that may not be realistic, but reducing the noise transmission by 10dB to 30dB might be doable.
Airborne Noise
Sounds originate all around us and travel outward from the source in soundwaves. The frequency of the sound determines the height and length of the repeated wave, which always travels in a straight line. Soundwaves, like the wind, will travel freely through open doors and windows, ducts or vents, and cracks and crevasses until they encounter a solid structure that deflects, reflects, absorbs, or traps them. They are often easier to control than structure-borne sounds.
Structure-Borne Noise
Impact, mechanical, and flanking noises are more difficult to control. Sound waves that strike the exterior walls of your home or office can vibrate through unless the wall structure absorbs, reflects, or traps all of the waves. A ball bouncing against a wall, floor, or even the ground outside, a chair being dragged out, a glass or shoe dropped, and the pitter-patter of feet and heels produce impact noise. Plumbing rattles, toilet flushes, furnace and air conditioning fans, and ductwork transmit noise through walls and ceilings too. Flanking noises reverberate, ricochet, and sneak around corners and into or out of rooms and buildings using indirect paths.
Different Methods of Soundproofing an Existing Wall
There are different ways to soundproof an existing wall. Some materials provide a low, medium, or high level of soundproofing with costs varying from cheap to moderate or expensive. So, depending on what you need and your budget you may want to pick and choose. Some are also permanent applications and others removable and transferable if you don’t want a forever solution, or you rent. The level of complexity of the solution may be easy, moderate, or difficult depending on your skill-set and toolbox inventory.
We all know individuals who make things look easy, and others who have difficulty putting a tack into the wall, you know your strengths best. Some solutions are messier than others too. Remember, injury and frustration increase with lack of sleep, so don’t be shy about asking for assistance or skilled help.
| Method | Level of Soundproofing | Complexity | Cost |
|---|---|---|---|
| Sound Blanket | Medium STC of 25 to 33 | Easy | Cheap to Expensive |
| Noise Reducing Curtains | Medium STC of 20 to 30 | Easy | Cheap to Expensive |
| Sound Absorbing Fabrics | Low to Medium STC of 10 to 20 | Easy | Cheap to Expensive |
| Soundproof Paint | Low 30% of mid-frequency | Easy | Moderate |
| Soundproof Wallpaper | Medium Blocks up to 25dB | Moderate | Moderate |
| Furniture Placement | Low | Easy | Cheap |
| Foam Wall Panels | Medium to High NRC 0.45 to 0.92 | Easy | Moderate Expensive |
| Acoustic Fabric Panels | High NRC 0.75 to 1.0 | Easy | Moderate Expensive |
| Sealing Perimeter Cracks, Gaps & Outlets | Medium to High STC of 53, NRC 0.75 - 1.0 | Moderate | Moderate Expensive |
| Blown-in Insulation | Medium to High STC 44 - 53, NRC 0.8 -1.0 | Difficult | Moderate Expensive |
| Green Glue + a Layer of Drywall | High STC of 56, 90% reduction across frequencies | Difficult | Expensive |
| Sound Reducing Drywall | Medium to High STC 48 - 80 | Difficult | Expensive |
| Channels | Medium to High STC 60+ | Moderate | Expensive |
| Mass Loaded Vinyl | Medium Improves STC by up to 32 | Easy | Moderate |
Most Effective Ways of Soundproofing Existing Walls
Once you’ve identified where the noise comes from and how much needs to be blocked, determine the most effective ways to achieve your goal. Soundproofing a wall usually involves a combination of steps and materials to block all the paths noise can take. A multistep plan should increase the wall’s mass and decouple it to increase absorption and isolation. It should also reduce conduction, resonance, and sound transmission to meet your goal.
Increase Mass
Look for materials that increase the mass of the wall between you and the noise source. The greater the mass the greater the sound reduction you’ll experience. A layer of 5/8” drywall may decrease the noise by 3dB while heavy 32oz curtains or MLV could offer better results.
Decoupling
Sounds vibrate through walls, floors, and ceilings so an effective way to stop impact, flanking, and mechanical noise is to decouple the wall or ceiling layers. Disrupting the vibrational path is the best way to stop sound transmission through barriers. Double-wall construction, the use of isolation clips and channels, or green glue are three methods used to disrupt sound pathways. Easy and Cheap Methods Easy and cheap sounds cliché, however, there are inexpensive materials that are easy to install and will help quiet a room.
Your budget determines what ‘cheap’ is and your skill-set determines how ‘easy’ the task is. The rating provided for different materials is based on what the manufacturer or industry identifies and may vary by location and installation. Remember, soundproofing means sound-reducing, blocking all noise is almost impossible and extremely expensive. The rating represents the amount of noise reduction in test settings, so it may differ from your set-up.
1. Soundproof Blankets
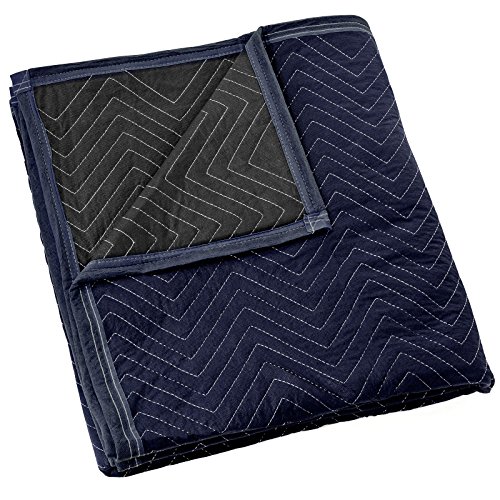
Soundproof blankets may be quilted or loose-filled with cotton, wool, or polyester fill. They may be manufactured for acoustic purposes, be homemade quilts, unquilted woven wool, cotton, or polyester blankets, or even quilted moving blankets. Some products have a dense layer of fiberglass quilted between layers of vinyl-coated fiberglass cloth. The cloth and batting absorb reverberation, vibration, and sound to dampen noise transmission. The heavier and thicker the material or layers of materials, the better the sound absorption.
Soundproof blankets trap low-frequency sound waves and help deaden the noise. The blankets reduce reverberation and bounce to lessen sound movement through walls, doors, and windows. Moving blankets are available in different sizes and several colors, while acoustic blanket material comes in 4’x8’ blankets or rolls of varying lengths with four color choices. Quilts and blankets come in a plethora of colors and designs and can be used to cover other blanket material for a more aesthetically pleasing finish.The blanket material can be mounted to walls or ceilings in different ways. Stapled to a 1×2 which is screwed to the ceiling or walls, suspended from wire or string with grommets so it can slide over or away from doors and windows, or nailed directly to the wall. If one layer doesn’t solve the noise, try adding more layers to increase the mass. The STC for soundproof blankets ranges from 25 to 33, while other options vary based on thickness and weight or mass of the material.
| Pros | Cons |
|
|
2. Noise Reducing Curtains
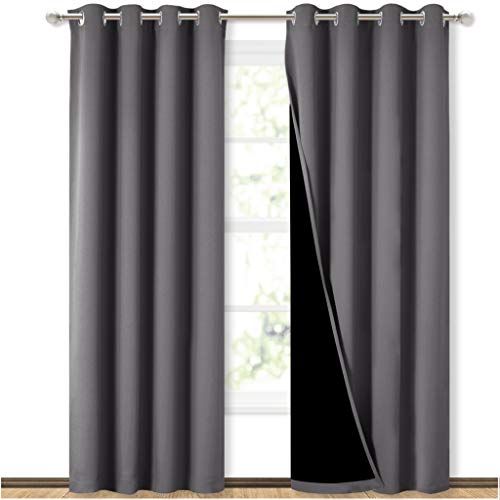
Noise-reducing curtains manufactured for industrial noise control often have a heavy layer of mass loaded vinyl or insulation sandwiched between heavy sound absorbing fabric which can give off noxious fumes. Curtains that decrease noise for the residential market have low or no off-gassing and commonly have a heavy 32oz velour or velveteen fabric backed with light damping (blackout) thermal vinyl or noise-blocking MLV.
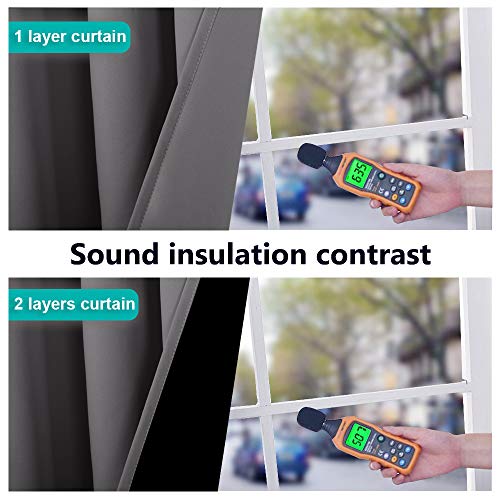 The vinyl blocks soundwaves while the heavy fabric folds trap and absorb the sounds to reduce reverberation, echo, bounce, and noise movement. Noise-canceling curtains come in a variety of colors, patterns, and textures and can be hung over doors, windows, and walls, or around only the bed.
Curtains should still have folds or pleats when pulled closed for more effective noise control. Acoustic curtains can decrease noise transmission between 70% and 80% when hung 6” to 12” from the wall.
They are available in different sizes, are easy to hang, and aesthetically pleasing. The cost varies with the quality, as does the sound absorbency and blockage with the fabric and vinyl weight.
The STC for noise-reducing curtains ranges from 20 to 30, while other curtains vary based on thickness and weight or mass of the material and vinyl.
| Pros | Cons |
|
|
3. Sound Absorbing Fabrics
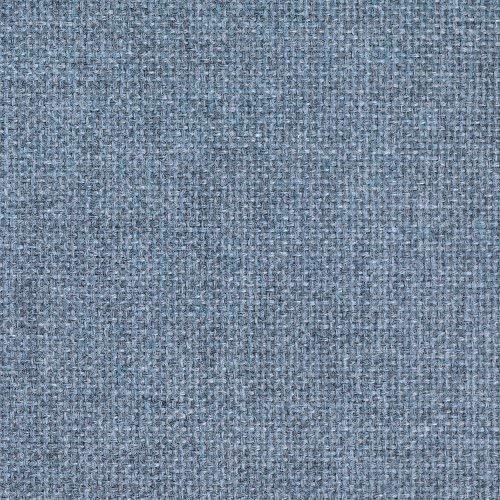
Sound-absorbing fabrics are designed to reduce sound movement but don’t eliminate all sound. Some fabrics absorb sound just as well as rated material but aren’t rated or tested, and thus are often less expensive than those that are. Select the best fabric for your project, and remember, the thicker and heavier the fabric, the better its sound control. The fabrics come in a variety of colors and textures and can be used for curtains, furniture coverings, and to cover diffusers, traps, and other sound panels.
The fabric is commonly 32oz or heavier, and may be thick velour or velveteen made from recycled material, or a heavy brocade or tapestry, The weaves and densities can control the sound differently, so choose what will work best for you. Fabrics can be combined with quilted insulation or MLV to improve the sound control too. Use the fabric to help decrease reverb, echo, and slap. Some fabrics have been rated with a sound absorption coefficient (SAC) between 0 and 1.00, with 0 being no absorption and 1.0 representing 100% absorption.
The rating scale compares frequency absorption between 250 Hz and 4000 Hz. It has been somewhat simplified with the use of the letter’s ‘A’ through ‘E’. The letter ‘A’ represents the average absorption between 0.9 to 1.0, ‘B’ between 0.8 and 0.9, ‘C’ between 0.6 and 0.8, ‘D’ 0.3 to 0. 6, and ‘E’ between 0.15 and 0.3. The STC and SAC vary from fabric to fabric but range between 10 and 20 depending on the thickness and weight, and what the fabric is used for.
| Pros | Cons |
|
|
4. Special Soundproofing Paint
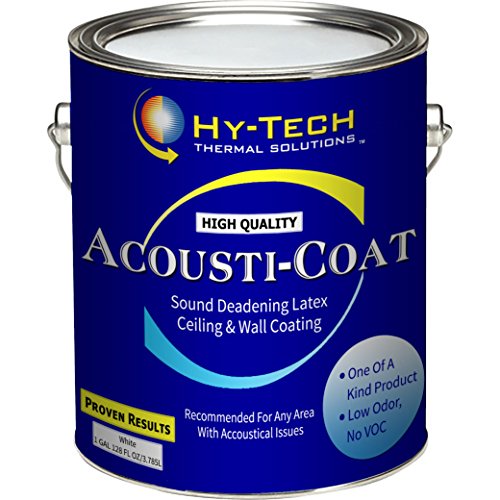
Acoustic or soundproof paint is a thick, heavy, water-based paint with more density than regular paints. It combines ceramic microspheres with thermacels or sound-absorbing cells and ceramic microspheres that act as fillers. The thermacels contain soft pigment that vibrates and absorbs sound energy when soundwaves hit them, damping ringing, tinning, echo, and transmission in the mid-frequency range by about 30% – although some claim up to 50%.
The ceramic microspheres add mass and further help with noise vibration. The paint won’t help with impact or loud noises, but with irritating quieter noises like fridge hum and conversation level noise, it makes a difference. Apply 3 or more coats with a sprayer for even coverage as brush and roller become saturated and heavy quickly, and drip. The thicker the paint the better, aim for about an 1/8” when all layers dry.
Sound deadening paint is ideal for living rooms, offices, and bedrooms to help mute conversation-level noise. The paint can be tinted or colored to suit but is only available in a flat eggshell-like finish which can feel rough or abrasive.| Pros | Cons |
|
|
5. Apply Soundproof Wallpaper

Soundproof wallpaper isn’t the paper-thin decorator stuff many people have nightmares about, it is thick soft foam in textured or 3D rolls, sheets, or panels that block up to 25dB of noise. They are designed and manufactured to look good and decrease noise, and are easy to apply, clean, and remove. They are available in different patterns, colors, thicknesses, and designs. Many products can even be painted for the desired effect. The thicker the material, the better it controls noise.
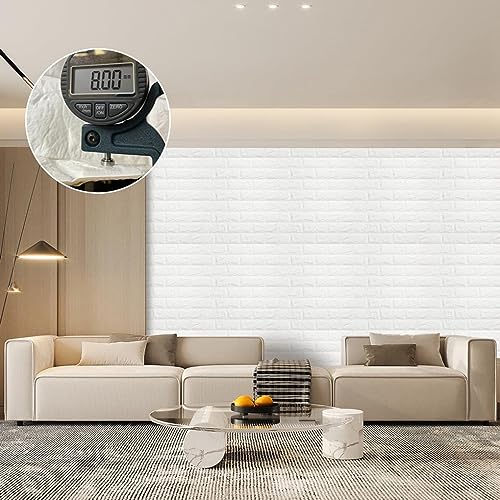 Thicknesses range from 1/4″ to 2” (or more) depending on the texture or pattern, and whether it’s a roll, sheet, or panel. The wallpaper may look and feel like brick, tile, stone, wood, or embossed metal, and is also available in smooth finishes.
The wallpaper is easy to cut with scissors or utility knives and may be self-adhering or require adhesive. The polyethylene foam dampens and reduces echo, reverb, and transmission, improving the quality of sound and level of noise disruption.
| Pros | Cons |
|
|
6. Proper Furniture Placement

Plush furniture covered in velveteen, suede, chenille, corduroy, or microfiber has more mass and will absorb sound better than stark, draconian furniture. Upholstered pieces absorb and deflect noise, so place them where they will interfere with noise movement. A padded upholstered headboard from floor to ceiling is an effective way to moderate sound movement into or out of a bedroom.
High-backed furniture provides greater surface area than low pieces, but even a footstool can help. Combining plush furniture with acoustic or light-canceling curtains and thick carpet with high-density underpadding will further reduce noise. Throw pillows add a decorative flair and also buffer sound, placed on hard furniture or along the top of sofas and chairs to increase the blocking area. Place the furniture near walls or where sound vibrates in or out of the room.
Along shared walls or between sound sources like the TV and where you need it quieter. Other pieces of furniture that have good mass are dressers, wardrobes, armoires, and bookcases. The larger size and capacity – when filled – provide greater sound-absorbing mass and can easily be placed against walls that offer little noise protection.
| Pros | Cons |
|
|
More Expensive Ways
Soundproofing or quieting may not require a deep pocket, but there are acoustic products that cost more than blankets, curtains, paint, and wallpaper. Those that are manufactured for sound attenuation commonly have been sound tested and rated, and so should identify how well they can control noise. Look for the STC, NRC, SAC, IIC, or TL ratings and go for the higher value, not necessarily the price tag.
7. Foam Wall Panels
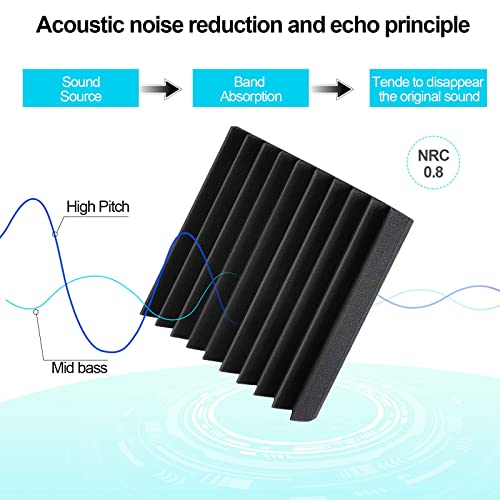
Foam wall panels are often made from open-cell soft, lightweight porous polyurethane foam and formed into flat, beveled, egg carton, pyramid, wave, block, or ridge and valley profiles. The panels are used to trap or absorb soundwaves. The soundwaves enter the foam and lose energy as they bounce and weave their way through the foam, and are much weaker when they exit the foam.
 The foam is available in different thicknesses and patterns, but limited color choices. Foam wall panels 1” to 2” will absorb and quiet noise reverberation and echo, and dampens mid to high-frequencies.
Thicker 4” to 6” foam is needed to absorb low-frequency noise. Foam panel placement is also important and may take some rearranging to achieve the desired results.
Rated panels range from an NRC of 0.45 to 0.92 depending on thickness and density. Some panels are self-adhering and others require a spray adhesive. Additionally, some foams have a Class-A fire-resistance rating which means they won’t make fires worse.
| Pros | Cons |
|
|
8. Acoustic Decorative Fabric Panels

Decorative acoustic wall panels range in thickness from 1” to 4” and help reduce bass, stop echo, capture sound, and thus improves the clarity of audio and sound control. They are available in a variety of sizes, colors, patterns, and even shapes. Covered in acoustic cloth, the panels are formed around acoustic foams, stone wool or fiberglass insulation, or Basotec and are often backed with fabric or glass cloth. It should be noted though, that the insulations offer greater frequency or broadband control than the foams.
 The panels not only absorb and condition sound, but they provide a decorative element to drywall, brick, concrete, and masonry walls. The panels can even be covered with personal photos or images applied to overlay the panels as pictures.
Panels secure to walls with French clips, picture wire, or liquid adhesive, and some panels are even self-adhesive for easy placement. The panels are rated with NRC values between 0.75 and 1.0 so will help control sound movement through walls and improve the sound within rooms.
Pro Note: Try making your own acoustic decorative fabric panels at a fraction of the cost using 1×4 pine for framing, your choice of fabric, colors, print or image, filled with stone wool, and backed with thin cloth. An easy project that can be made to fit wherever needed.
| Pros | Cons |
|
|
Most Effective Methods (High Difficulty)
The most effective methods for addressing disruptive noise through walls are also permanent. They involve sealing cracks, gaps, and crevasses and adding dense mass for whole wall treatment to block airflow and noise transmission. They are also often more costly and require skills and tools you may not have, so the cost may need to factor not just materials but skilled professionals. These are highly effective methods with potentially a greater improvement return for your dollar, so if you have a lot of noise to block, or the other methods fail, give these a try.
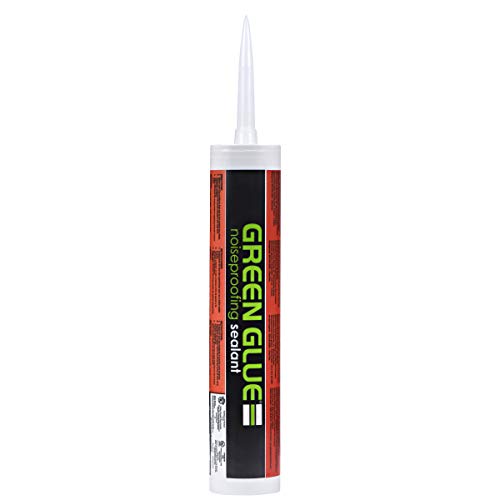
9. Seal the Perimeter, Cracks, Gaps and Outlets

Soundwaves, like many things, take the path of least resistance. Anywhere there is airflow through a barrier, sound will quickly travel. Cracks and gaps around outlets, fixtures, doors, windows, wall panels, and where walls meet with each other, the ceiling, or floor offer easy access to sound waves. Even pin and nail holes are an open invitation! Use a 3/8” bead of water-based acoustic caulking or sealant to fill seams, cracks, gaps, and holes.
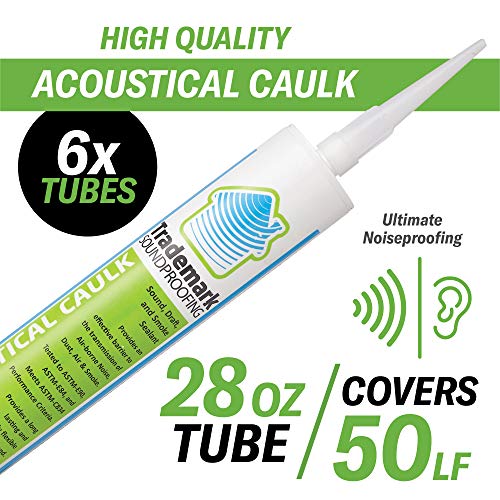 The elastic material resists sound vibration and is paintable once it dries to a tough flexible film. The caulking can be doubled for deeper or wider cracks and has an STC of 53. Remove window and door molding and fill the gaps between drywall and casing. For wider gaps, stuff stone wool or fiberglass in, use foam weatherstripping to fill the opening and seal around it with acoustic caulk to create an anti-vibrational barrier to sound penetration. The combination of materials can achieve an NRC between 0.75 and 1.0 around windows and doors.
Use draft stoppers, door sweeps, and flexible weatherstripping around door and window openings too to improve their seals and prevent noise sneaking under doors too. Outlets, switch boxes, and ceiling fixtures are holes in wall and ceiling barriers that let air and sound flow through. Remove cover plates and use acoustic foam or caulking, or both to seal the gaps between the box and the surrounding drywall.
Use premade outlet gaskets, draft stoppers, or homemade foam-rubber ones that fit between cover plates and electrical boxes or fixtures to further seal out sound movement. The amount of noise reduction depends on how well all openings are sealed.
| Pros | Cons |
|
|
10. Blown-In Insulation

Blown-in insulation is loose insulation material made of fire-rated cellulose, stone wool, or fiberglass. It can be blown into wall and ceiling cavities between studs and joists through holes cut into the drywall or sheathing. The insulation fills the cavity, sealing gaps and holes where sound and air can squeeze through, helping to block, damp, and absorb noise.
The holes are placed at the top of the stud cavities and a hose inserted to fill the spaces from bottom to top. Batts or bags of loose insulation are placed in a machine that grinds and blows the insulation through the delivery hose.
 Once filled, the hose is removed and a plug inserted to close the hole. The denser the insulation and filling, the higher the thermal and acoustic return. The cost and sound suppression vary with the material used, with the best results being stone wool, cellulose, and then fiberglass.
Blown-in insulation can be done by professionals or ambitious DIYers. Locating studs, wiring, ductwork, and plumbing and determining if cross-bracing was used, are part of the task. Cutting or drilling one or more hose holes in each cavity, depending on obstructions, can be messy and time-consuming too. Once the cavities are filled, they must be plugged or sealed and then finished to match the wall surface they were cut into.
Once filled, the hose is removed and a plug inserted to close the hole. The denser the insulation and filling, the higher the thermal and acoustic return. The cost and sound suppression vary with the material used, with the best results being stone wool, cellulose, and then fiberglass.
Blown-in insulation can be done by professionals or ambitious DIYers. Locating studs, wiring, ductwork, and plumbing and determining if cross-bracing was used, are part of the task. Cutting or drilling one or more hose holes in each cavity, depending on obstructions, can be messy and time-consuming too. Once the cavities are filled, they must be plugged or sealed and then finished to match the wall surface they were cut into.
| Pros | Cons |
|
|
11. Second Layer of Drywall + Green Glue
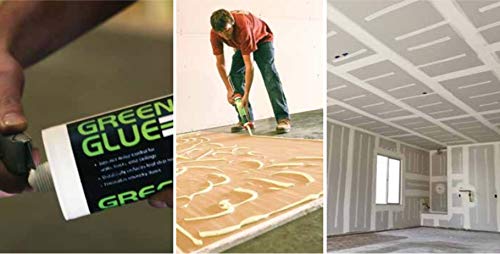
Adding another layer of drywall to an existing wall increases the mass and thus helps to decrease sound transmission. Using 5/8” drywall will provide better results than 1/2″ but also costs more. Sandwiching a layer of viscoelastic Green Glue between the two layers of gypsum provides an anti-vibrational barrier that can reduce between 70% and 90% of low, medium, and high-frequency transfer, or to an STC around 56 depending on wall construction.
 Although it may sound easy, there are many steps that need to be done properly for the best results. First, locate and mark the location of studs on the floor and ceiling so you can find them easier. Remove receptacle and switch covers, fixtures, and anything else that will interfere with the new layer. Some electrical box extenders may need to be installed to reach through the new layer. Seal all cracks, crevasses, and holes in the existing wall.
Place two 1/4″ blocks against the base of the wall to lift the new panel off the floor to separate floor-to-wall sound movement. Apply Green Glue with a drywall mudding paddle to the surface of the wall or to the back – gray side – of the gypsum panel. Avoid the studs and screw the panel into the existing drywall to help decouple the wall and further decrease vibrational sound movement. Leave a gap between the new layer and the ceiling too.
Fill the gaps between the board, floor, and ceiling with acoustic caulk, seal around outlets, switches, and fixture openings, and between gypsum panels. Plaster joints and screws, sand, prime and paint to finish.
| Pros | Cons |
|
|
12. Special Sound Reducing Drywall

An alternative to adding a second layer of standard 1/2″ or 5/8” drywall is to add a layer of sound-reducing drywall. It is specially manufactured with two layers of gypsum for increased mass sandwiching a layer of viscoelastic material for controlling sound vibration transmission. Most panels install similar to regular drywall but provide greater sound control.
QuietRock has been around for more than 20 years and offers a good selection of products between 1/2″ and 1-3/8” thick, such as QuietRock EZ Snap and QR 545 have STC ratings between 48 and 80. SilentFX® QuickCut™ produced by CertainTeed is a 5/8” drywall product with an STC of 56. National Gypsum’s Sound Brake XP is available in 1/2″ and 3/4″ thickness and provides up to an STC of 64.
 The ratings all depend upon wall construction and installation practices, but the potential is available. Installation is similar to adding a regular layer of drywall, it’s just a more effective sound barrier. Cost for all sound-reducing drywall is a drawback for most residential projects since most sound-reducing drywall products are 5-times the cost or more of regular drywall.
Additionally, the weight of the products can be a deterrent too, with a single 4×8 sheet weighing between 15lbs and 150lbs more than a standard 1/2” sheet.
| Pros | Cons |
|
|
13. Resilient Sound Clips and Channels
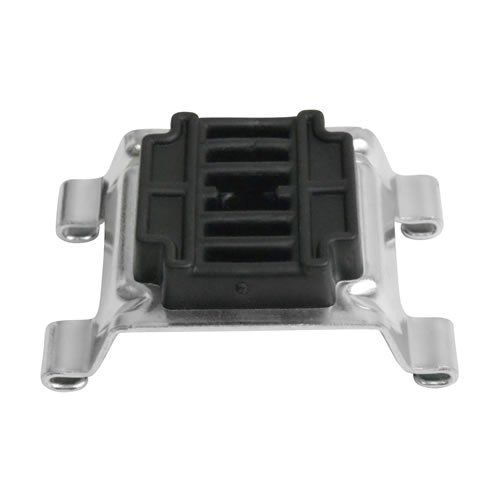
Resilient channels and sound clips are another way to decouple wall layers and break the sound transmission path through walls and ceilings, helping to quiet a room. Although some clips and channels can be used independently of each other, the results are better when combined. The clips have a rubber washer that separates and decouples the fastening of the layers, effectively stopping noise movement.
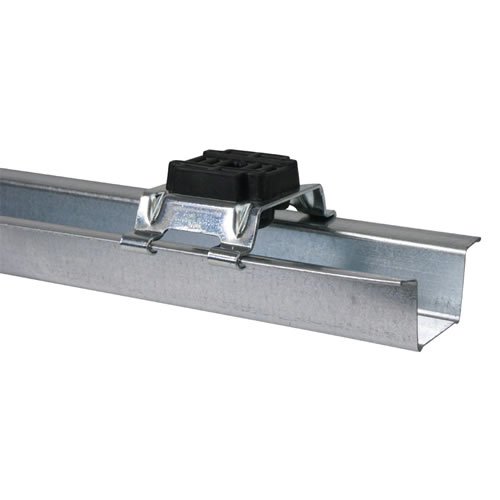 The clips screw to the studs or joists through the existing drywall and are aligned and oriented to receive the resilient channels. The channels are then inserted horizontally or vertically into the clips depending on their orientation. Drywall is then screwed to the channels using shorter screws to ensure decoupling.
The clips can improve STC by 15 points, and when combined with the channels can achieve STC values of 60 or better depending on the wall material used.
| Pros | Cons |
|
|
14. Mass Loaded Vinyl

MLV or mass-loaded vinyl is a heavy material used to dampen sound and vibration and reduce its movement. Available in varying thicknesses and dimensions, it is commonly used on walls and ceilings, and to line curtains. The weight per square foot determines its soundproofing contribution, with 1/16” weighing 1/2 -pound, 1/8” 1-pound, and 1/4″ 2-pounds and sound improvements up to 32 STC points.
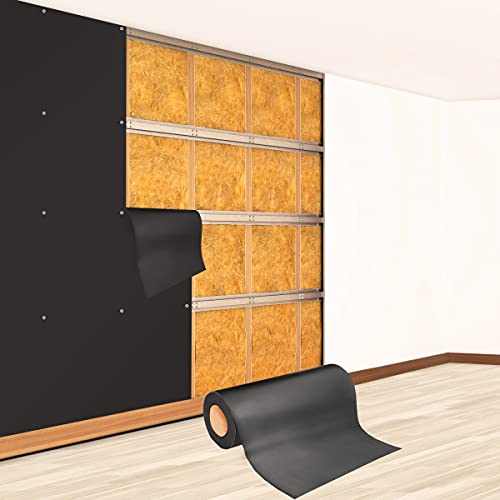 The vinyl is commonly stapled or tacked to an existing wall, ensuring seams overlap, and then covered with a layer of regular or sound-reducing drywall.
The combined STC values depend on MLV thickness, type and thickness of drywall, and wall construction techniques.
However, the vinyl works to block sound with or without the drywall, so it is a possibility for tenants to use.
| Pros | Cons |
|
|
How to Soundproof Brick Walls
Soundproofing exposed brick, masonry, and concrete walls can be done in a variety of ways depending on the desired finish. Start by filling all cracks, crevasses, and utility openings to seal those sound passages. If you like the exposed look, identify where the noise seems to penetrate and hang heavy curtains, soundproofing blankets, or a tapestry lined with MLV to block the noise.
Hang acoustic or foam panels to absorb sound and rearrange or acquire furniture to better control noise. For walls that weren’t left exposed for aesthetic or design purposes, there are a number of ways to finish them and control noise movement. For the best results, consider framing a 2×4 or 2×6 wall in front of the existing wall. Leave a 1/2″ air gap between the two walls to separate and prevent vibrational sound movement. Insulate stud cavities with stone wool, install resilient clips and channels, and attach sound-reducing drywall.
You can even staple MLV to the studs prior to installing the clips and channels. The sound control improvement can reach or surpass an STC of 67, but also shrinks the room space and your bank account.
Conclusion
Soundproofing or quieting the amount of noise passing through walls doesn’t need to break the budget. There are inexpensive solutions, both temporary and permanent, that will block and absorb sound. The effectiveness depends upon how much noise needs to be decreased and what you’re able or willing to spend.
Options like sound blankets, noise-reducing curtains, MLV, acoustic or foam panels, and soundproof paint or wallpaper can be done by tenants and homeowners seeking to control disruptive noises. Other whole wall methods are permanent and more costly but can provide greater results too. Hopefully, we’ve provided you with information that helps you determine how best to soundproof your existing interior walls.