Few things bring a smile to a homeowner’s face, quite like hardwood floors. That’s why it’s so disheartening when wear and tear take their toll, leaving you with a dull, uneven, and uninspiring surface. If your hardwood floors aren’t looking their best, figuring out how to restore hardwood floors without sanding might be the only thing on your mind.
You typically have three options if you want to restore your hardwood floors without sanding. Liquid abrasive kits, buffing and applying new polyurethane, and using a hardwood floor revitalizer can all do the trick. However, which is right for you can vary.
Hardwood floors are one of the most breathtakingly beautiful flooring options, which is why they’re highly desirable. If you want to refresh your hardwood flooring without having to sand, here’s what you need to know about how to restore hardwood floors without sanding.

Contents (Jump to Topic)
- Why Do You Usually Sand When Restoring Hardwood Floors?
- Can You Refinish Hardwood Floors Without Sanding?
- How to Restore Hardwood Floors Without Sanding
- Can You Restore Waxed Hardwood Floors Without Sanding?
- Can You Restain Hardwood Floors Without Sanding?
- How to Darken Hardwood Floors Without Sanding
- What’s the Fastest Way to Restore Hardwood Floors Without Sanding?
- Is Restoring Hardwood Floors Without Sanding a Good Idea?
- Conclusion
Why Do You Usually Sand When Restoring Hardwood Floors?
Sanding floors before you refinish them allows you to manually remove any existing finish or wax. It lets you get to the bare wood, giving you an even, fresh surface for refinishing. As a result, the final look after you refinish is typically better.
Additionally, sanding can address a range of issues that can occur with hardwood flooring. You can sand to remove finish-penetrating scratches, giving you an even surface. Sanding also lets you address stains and discoloration before applying a new finish.
Can You Refinish Hardwood Floors Without Sanding?
You can refinish hardwood floors without sanding in specific situations. If your flooring is in generally good condition, there are no finish-penetrating stains or scratches, and your floors aren’t waxed, sanding may not be necessary.
However, deeper gouges, finish-penetrating stains, or other condition issues could make sanding essential. Additionally, sanding could be a must if you want to restain your hardwood floors, as it allows you to remove the existing finish without using harsh chemical strippers.
How to Restore Hardwood Floors Without Sanding

If you’re trying to figure out how to restore hardwood floors without sanding, you have several options available. They vary regarding the time and materials required, and each may be more effective in specific situations.
In most cases, it’s best to consider all available options. If you favor one approach over the others, consider doing a test spot to see if you like the results. That ensures you’ll be happy with the outcome before you move forward.
Regardless of your chosen approach, one of your first steps will be to don protective equipment. Gloves, eye protection, and a dust mask are essential to avoid contact with any chemicals. Shoe covers are also wise, as they can help you avoid tracking dirt onto the flooring.
Additionally, you’ll need to clear the room and clean it thoroughly. Remove all furnishings from the room. Also, remove doors off their hinges if they hang across the floor you’re working on, ensuring they won’t cause you to miss spots.
Once the area is clear, wipe down any surface above the floor to remove dust that could potentially fall onto the flooring. This includes shelves, windowsills, blinds, and baseboards.
After that, sweep the floor to remove larger debris. Follow that up by vacuuming using a hard floor setting or attachment. Finally, use a microfiber mop and clean water to remove additional dirt, dust, and debris.
You may also want to close or block any heating or cooling vents. That ensures that airflow through HVAC systems won’t spread dust into the space during the process.
If your flooring butts up against another type of floor, use painter’s tape to protect it, ensuring it seals tightly. You can do the same with your baseboards, installed cabinets, or similar items.
Once those steps are complete, you can begin the chosen option as outlined below.
Using an Abrasion Kit
1. Choose a Store-Bought Abrasion Kit
Hardware and home improvement stores typically carry various chemical abrasion kits for restoring floors. While the general application process is the same, each may have its own benefits and drawbacks. Do some research to determine which option is best for your needs.
Also, review the manufacturer’s directions to learn the nuances of using the specific product. Most use a highly similar process, but there could be product-specific guidance regarding the amount of product to use, how long to scrub and similar details.
2. Apply the Liquid and Scrub
Usually, you’ll take the liquid abrasive and place it into a tray. This allows you to dip the provided scrubbing pad into the liquid and apply it to your hardwood floors.
Attach the provided scrubbing pad to a block and broom handle for easier application. That allows you to apply more force. Plus, a broom handle gives you more reach and lets you stand while you work.
Dip the pad into the liquid, ensuring it’s wet but not saturated to the point where it will drip. Press it against the side of the tray to remove excess liquid.
Next, choose a small section of your floor. Use the scrubbing pad to firmly work the surface, going with the grain. Scrub each part of the section several times.
3. Wipe the Surface
In most cases, you only want the bulk of the abrasive liquid to sit on your floors for up to five minutes. Once the first small section has been treated, wipe up any excess liquid with a clean microfiber cloth to remove the excess.
As you wipe, you don’t have to completely dry your floor. Instead, you want to ensure that there isn’t enough liquid to seep between the planks, as that could damage your underlayment or subfloor. In the end, there should be a light film remaining, but nothing more.
4. Move to the Next Section
After scrubbing and wiping the first section, move to the next one. Use the same process as outlined in steps two and three.
Once that section is complete, proceed to the following small section. Continue the same process repeatedly until your entire floor is coated.
5. Wait for the Floor to Dry
After you’ve applied the liquid abrasive to your entire floor, you’ll need to wait for it to dry. The exact time may vary by manufacturer, so refer to the included directions for details. However, this part usually takes around 30 minutes.
6. Mop the Floor
After the floor dries, it’s time to mop again. Take a gallon of warm water and put it in a bucket. Then, add two tablespoons of ammonia-free and bleach-free liquid dish soap to the water, stirring to distribute it evenly.
Take a clean microfiber mop and lightly dampen it with water and soap. Mop in small sections, wiping up any puddles quickly. Additionally, rinse the mop regularly and replace the water and soap solution if it gets dirty.
After mopping, wait for the floor to dry completely before proceeding.
7. Address Scratches
Check your floor for scratches once it is dry. If you spot any, take a small artist’s paintbrush and apply a stain that matches the rest of the flooring. Gently feather the stain out to ensure it blends, then blot up any excess with a rag.
Grab a hair dryer and dry the stained area for about one minute to seal the stain. Next, clean the paintbrush and apply a thin coat of finish, feathering the edges.
8. Apply the New Finish
After addressing the scratches, you can apply your new finish. Start by using a brush to handle the edges, giving you more control.
Next, use clean water to dampen the applicator pad, squeezing out excess water. Apply the applicator pad to the block and connect it to the broom handle. Pour some of the finish into a tray and dip the applicator. Don’t squeeze the applicator to remove excess, as that can lead to bubbling.
Carefully spread the finish onto your floor, working in small sections and going with the grain. It’s also wise to hold the applicator at an angle to direct excess finish in one direction. Additionally, use as few strokes as possible.
If you spot drips or puddles, use a brush to smooth them out immediately. Continue dipping the applicator as needed and working in small sections until the floor is coated.
Sometimes, you’ll want to let the floor dry and then apply a second coat if you have enough finish remaining. After that, let it dry (based on the time listed on the manufacturer’s recommendations) before walking on the surface or bringing items back into the room.
Buffing and Recoating with Polyurethane

1. Hammer Down Protruding Nails
Before using the buffer, take a moment to address any protruding nails; otherwise, they may catch the buffing pad.
2. Seal Your Work Area
While you’ll want to ventilate the room by opening windows, buffing can create a lot of dust. As a result, you want to make sure that HVAC vents are closed.
Additionally, seal off the room to ensure dust doesn’t travel into other parts of your home. Cover doorways or openings with sheeting to provide protection.
3. Hand Buff the Edges and Corners
In many cases, buffing equipment won’t reach into corners or room edges due to its shape. Since that’s the case, you’ll need to hand buff those spots using the same pad type.
Apply moderate pressure and go over each area three or four times. That will rough the surface enough to ensure the new finish will adhere.
4. Begin Buffing
After addressing the nails, you can start buffing. Begin in the middle of your floor, giving you a little space to familiarize yourself with how the buffer moves and pulls.
Once comfortable, start on one side and move with the grain, using a side-to-side motion to buff the floor. Limit the number of passes over a section of flooring to just one or two to avoid harming the finish.
In many cases, the buffing pads only last 10 to 15 minutes of continuous use. As a result, you’ll want to check it every few minutes to examine its condition. If you see buildup or debris, wipe it away. Once the pad looks worn, flip it if it’s dual-sided or replace it with a new one.
5. Wait for 15 Minutes
Once you finish buffing the room, close any open windows and wait for 15 minutes, giving the dust a chance to settle, making it easier to remove.
6. Clean the Floors
Begin cleaning by wiping down any surfaces above the floor that have dust. This ensures that debris won’t fall to the floor when you apply the finish.
Next, use a shop vac to remove as much dust from the floor as possible. Make sure to give it several passes, and focus on the spaces between the floorboards where dust may settle.
Finally, use a clean microfiber mop to clean up the rest. Use only water to mop, as cleansers may prevent the new finish from adhering.
7. Apply Polyurethane to the Edges
After cleaning, you can begin applying your new polyurethane finish. Start along the edges of the room. Using a brush, apply a smooth, even, thin coat to the perimeter of your room.
8. Tackle the First Coat
Once the edges of your room are handled, you can focus on the rest of the floor. Pour the finish into a tray to make it easier to use. Then, use an applicator pad and a long handle to make the process easier and create an even final look.
You’ll most likely want to start along one wall and work toward a doorway. Keep the applicator at an angle as you drag, working with the grain. If you have puddles or drips, address them quickly with a brush.
Then, continue until your floor is covered. Once it is, let the first coat dry. Refer to the manufacturer’s directions for the exact drying time required.
9. Apply the Second Coat
After the first coat dries, you can apply the second. Use the same process as you did for the initial coat. Finally, let the finish cure, waiting as long as the manufacturer recommends before using the room or bringing furnishings back into the space.
Using a Revitalizer
1. Choose a Floor Revitalizer
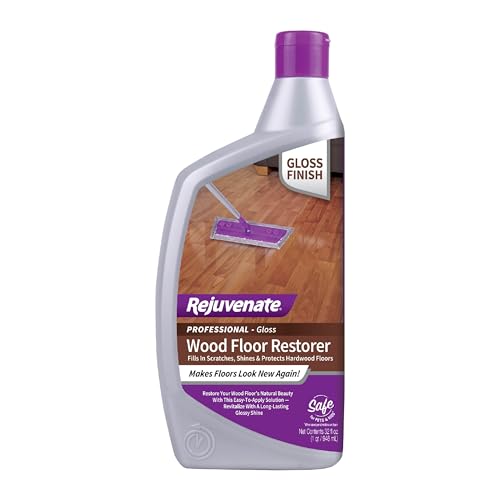 Using a floor revitalizer is a solid option if your floors need a light refresh and have no major scratches, unevenness, or defects. There are several options available, and they’re typically found at home improvement or hardware stores.
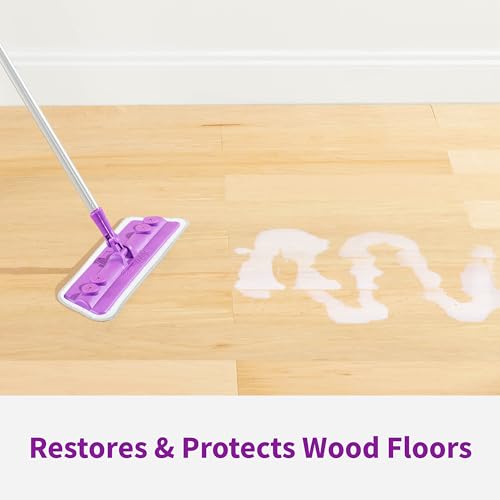
2. Apply the Revitalizer
You’ll want to refer to the manufacturer’s directions regarding the application. Typically, you’ll use a mop or similar item to apply and spread the revitalizer. You may need to use a brush along the edges, but that may depend on the type of mop you use.
3. Let the Revitalizer Dry
 After applying the revitalizer, you simply need to let it dry. Exact drying times can vary, so refer to the manufacturer’s instructions for precise timelines. However, it typically takes an hour or less.
Can You Restore Waxed Hardwood Floors Without Sanding?
In most cases, restoring waxed floors without sanding isn’t an option. The wax will prevent new finishes from adhering correctly, so removing it is essential.
If you aren’t sure whether your hardwood floors are coated in wax, choose an inconspicuous spot, such as in a corner, and place a few drops of mineral spirits on the floor. Let it sit for a few minutes, then wipe the spots with a clean, white rag.
After wiping, if the rag still looks clean, your floors aren’t waxed. If you see brown, earthy yellow, or shiny residue, there’s wax on your hardwood floors.
If you do have wax and your floors simply look a bit dull, applying a new coat of wax and buffing the surface may be enough to restore the shine and smooth the surface. However, this won’t correct issues like uneven coloring or deeper scratches in many cases, so keep that in mind.
Can You Restain Hardwood Floors Without Sanding?
Generally speaking, sanding is the best approach if you want to restain your hardwood floors. You can’t stain the wood if there’s a finish on the surface. Unless the finish is removed, the stain won’t penetrate the wood.
However, you can use a chemical stripper to remove the finish. This will also allow you to get down to the wood surface without as much manual labor. Just keep in mind that chemical strippers are complicated to use and do involve hazardous materials.
How to Darken Hardwood Floors Without Sanding
If you want to darken your hardwood floors without sanding, you’ll typically need a tinted finish. For example, you can find tinted polyurethane that will make your flooring appear darker.
However, tinted finishes don’t penetrate the wood. As a result, high-traffic areas may appear lighter than the rest of your floor as the finish wears away.
If you want to darken your wood floors in a way that won’t wear off due to foot traffic, you typically need to sand them. That allows you to get to the bare wood. Then, you can apply a new, darker stain and fresh finish.
What’s the Fastest Way to Restore Hardwood Floors Without Sanding?
Generally, the fastest way to restore hardwood floors without sanding is by using a revitalizer. These will restore shine and can even address light surface scratches.
If you’re flooring needs more than a simple refresh, a liquid abrasive or buffing and applying a new coat of polyurethane may do the trick. Which option is quicker may depend on your comfort level with the approaches. Additionally, the drying times can vary based on the products you select, so keep that in mind.
Is Restoring Hardwood Floors Without Sanding a Good Idea?
Restoring hardwood floors without sanding can work in many situations, but it isn’t ideal in all circumstances. As a result, sanding might be essential depending on the current state of your floors.
If your floors are waxed, then sanding might be essential. Otherwise, any new finish will fail to bond correctly, leading to uneven results.
Sanding is also a must for floors with deep scratches that penetrate past the finish. It allows you to remove the finish and address the scratch, giving you a better final look.
If you have significant finish wear in high-traffic areas of your home, sanding is also the better choice. It allows you to get an even, fresh surface before you restore the hardwood floors. As a result, the new finish will look better once the job is complete.
Finally, sanding is the only way to address the discoloration if you have notable stains that penetrate through the finish – such as water damage or pet stains. Otherwise, the spots will remain when you apply your new finish, which isn’t ideal.
Conclusion
At this point, you should have a solid idea of how to restore hardwood floors without sanding. Consider the condition of your flooring to determine if one of the three options above can meet your needs. If so, start with a test spot to ensure you get the desired result, allowing you to confidently move on to the rest of the floor.
Did you learn everything you wanted to find out about how to restore hardwood floors without sanding? If so, let us know in the comments. Also, if you know someone trying to restore their hardwood floors without sanding, please share the article.