There are so many things to like about laminate flooring. It’s cheap, durable, and it looks good if installed properly. What some people don’t know is that you can put laminate flooring on stairs, too. Below, we’ll go over how to install laminate flooring on stairs so that you can match your stairs to the rest of your floor.
To install laminate flooring on steps, you’ll need to glue a couple of pieces of your flooring together. Once dry, you can cut that piece to fit your tread and the riser. Leave your tread slightly short, so you can fit your stair nosing piece onto the front. Install the tread first, then the nosing, and the riser after. Glue it all to the subfloor with construction adhesive.
In this article, we will go over exactly how to measure, cut, and install laminate flooring on stairs to look as good on your stairs as it does in the rest of your house.

Contents (Jump to Topic)
What is Laminate Flooring?
Laminate flooring is made to look like wood, but that is about where the similarities end. Laminate is a form of melamine mixed with formaldehyde. Using various chemical processes, laminate is created to form an extremely durable solid that can act as flooring but is also used in countertops, whiteboards, cabinets, and many other places.
Laminate flooring is more than just the core ingredient. What you see is a high-resolution photo of the real wood grain. That photo is covered with a clear aluminum oxide finish that protects the “look” of the laminate.
There are concerns that the formaldehyde in the laminate could cause long term health effects. No definitive studies have proven this to be the case; although you are cutting laminate, you should wear a face mask and goggles if your cutting tool is spitting lots of dust.
It should be noted that laminate flooring is not plastic. The processes to create plastic versus laminate are completely different. On the other hand, understand that when you buy laminate flooring, you are buying a product that is essentially a stew of chemicals hardened into a plank that you can walk on.
Can You Put Laminate on Stairs?
You can put laminate on stairs, and most laminate manufacturers provide nosing pieces that fit onto the front of the tread. Sold separately, they fit with the regular laminate planks and go on the edge of the stair tread to provide a clean look and continuity between the tread and riser.
Installing laminate on your stairs is not quite as simple as installing it on your floors. First, stairs are one of the highest impact areas of your home. That means the laminate on your stairs needs extra adhesion – you’ll need to glue it to your subfloor.
Second, while laminate manufacturers do provide a special stair nosing accessory, they don’t make special pieces to fit the standard tread or riser lengths of stairs. That means you’ll have to make lengthwise cuts of your laminate planks to fit the risers and treads.
Pros
- Low-cost solution
- Relatively easy installation
- Highly durable
Cons
- Difficult to repair
- Laminate is prone to movement
Cost
Laminate costs anywhere from $0.50 to $3 per square foot. Naturally, there are high-end and low-end products that you can pay more or less for, but nearly all laminate will fall into that price range. Remember, laminate on stairs does not use underlayment, so you can strike that cost from your budget for this project.
A laminate stair nose piece may be your greatest cost during your stair install. One can typically cost anywhere from $30 to $50 or more. They are around 80” long, so depending on how many steps you have, you may be able to get away with only buying a couple.
Size
Nearly all laminate flooring comes in 48” lengths. Unlike hardwood flooring that comes in a wide variety of lengths, laminate is one uniform length.
Width of laminate depends on the type you buy and what style you are looking for, but the wider the planks, the more expensive – usually. Laminate can be as thin as 3” and be as thick as 7” or greater.
Thickness is also an option for buyers. Thicknesses range from 7mm to 12mm and this should be on your radar when purchasing laminate for stairs. You’ll want the thickest possible product for your stairs. Thick laminate floors won’t bow or give as much as thinner laminates.
You’ll see products that have ratings featured prominently on the box that looks like “AC-1”. This is a durability rating applied to all laminate products. Laminate flooring is rated from 1 to 5 based on durability, with 5 being the most durable. This is another aspect to consider when purchasing laminate for stairs. AC-4 is a good rating for a laminate product in a stair application. AC-5 may be more difficult to find, as these products are typically only used in commercial applications.
Laminate Vs. Hardwood Treads and Risers
The primary advantage of laminate over hardwood treads and risers is cost. Let’s break down the cost between a hardwood tread and riser vs. using laminate for the same purpose.
Hardwood treads can cost anywhere from $20 to $30 or more. A hardwood riser is typically less, around $20. A flight of 10 steps, therefore, would cost about a total of $350 if using hardwood.
On the other hand, you could use the laminate for that same flight of steps. Your average step is about 36” wide. A tread and riser are about a total of 5 square feet. A box of laminate is typically just over 15 square feet, so you’ll need about 3.5 boxes of laminate for that same flight of stairs.
Also, hardwood nosing that is around 80” are upwards of $80, while laminate nose pieces are closer to $40 for the same length.
Even taking an expensive brand of laminate, at close to $3 per square foot, you’ll be paying less than half the cost – about $200 – than you would be for hardwood treads and risers.
How Much Laminate Will I Need?
A standard tread is around 11” long and a riser is about 7”. Stairs start at 36” wide. If you do the math, the total square footage of a tread plus a riser with those dimensions is above 4.5 square feet.
A staircase with 10 treads and 11 risers will require nearly 47 square feet of laminate flooring. That means you would need either 3 or 4 boxes of laminate flooring for a staircase with ten steps.
You’ll also need the nosing that goes with your laminate product. Using stairs that are 36” wide, you’ll need 3 nose pieces per a 10 step flight of stairs.
How to Install Laminate Flooring on Stairs
Stairs are often a very high traffic area in a house. When installing laminate on steps, you’ll need to focus on securing them to the subfloor beneath. The laminate nose, in particular, can get dislodged easily due to wear and tear, so you’ll want to use quality construction adhesive along as well.
Tools:
- Table saw
- Miter saw with a fine blade
- Construction adhesive
- Hammer and 6d nails
- Impact Driver/Screws for nosing, treads and risers – depending on the manufacturer
- Measuring tape
- Level
You’ll also want to consider renting or buying a laminate floor cutter. These make precise cuts in your laminate – using a handsaw or circular saw can result in planks that are not completely flush with the wall or another plank. You don’t want imperfections in a high traffic area – you’ll see them every day.
1. Prep the Subfloor
The key to a successful laminate installation on steps or a regular floor depends on having a level subfloor. Installing laminate over tile or even vinyl is not a good idea because the tile is not an even surface and could cause the laminate to bend and move. Gluing to vinyl is also not ideal – you’ll want to remove it first.
Since you are gluing your laminate as well as nailing it, you’ll want a surface beneath your laminate that provides optimal adhesion. The rough surface of wood, whether plywood or lumber, will ensure your laminate adheres properly. Smooth surfaces like vinyl or other synthetics do not glue as well.
2. Glue Two Planks of Laminate Together
The next step in your installation process requires you to glue some of your laminate pieces together.
The width of your tread and riser will never be the same as the width of one of your laminate pieces or two combined. Therefore you’ll be placing at least more than one plank of laminate on each tread and riser. However, one of those will need a lengthwise cut to fit the tread and riser width.
Glue enough planks of laminate together so that it fits the width of your tread. Typically this would be two pieces unless you’ve purchased a narrow product in which case you’ll glue three or more.
Use wood glue to glue your laminate together. PVA type II glue is ideal. It has a lower moisture content than typical wood glue, which will ensure that the bond is stronger and won’t seep into the laminate. A tight bond is critical for laminate on steps.
Once you have your planks glued together, you’ll need to let them dry. Remember to wipe away any excess glue. Always glue laminate on the tongue and not the groove. Putting a very small bead across the tongue will ensure adhesion but also minimize the amount you’ll need to wipe away.
3. Measure Tread and Riser Length
Now you need to measure the exact tread and riser length of your steps. Measuring the riser length is simple. Measure from the bottom to the top of the step and you have your riser width. You’ll install your riser first, starting at the top step, and work your way down.
The tread will sit flush up against your riser, so subtract the thickness of the riser from the width of the tread. Therefore, if your tread measures 11 ½” and the thickness of your laminate is ⅜”, then your tread will be 11 ⅛”.
Also, your tread won’t go to the edge of the stair. The laminate stair nosing will fit against the tread edge and be glued and screwed to the subfloor. Nose size depends on the manufacturer. They either sit on top of the tread and lip over the riser, or they are flush with the tread and sit on top of the riser.
You need to read the manufacturer’s instructions for the nosing installation to determine how much length you need to give for the nose piece. Remove that amount from the length of your tread as well.
4. Cut the Treads to Length and Width
Time to make your cuts. If you are sure your stairs are of uniform width and length down, you can go ahead and make all your cuts ahead of time. If you live in an old house or you think your stairs might not be uniform, then you’ll want to measure each tread individually to get an exact cut.
Remember, treads need to sit flush against either wall as steps don’t usually have edge trim to cover edges. If your laminate doesn’t sit flush to your stair walls, you’ll notice it every time you use the stairs.
Before you cut your treads, take a look at your nosing. If the nosing has a groove, then it will sit in the tongue of the tread, so make sure you do not cut off the tongue of your tread when cutting it to width.
On the other hand, if your nosing is designed to fit over your tread, then you don’t have to worry about leaving the tongue end of your laminate on and you can cut your treads to width however you want.
Assuming your stairs are of uniform size, cut your treads first. Accounting for your riser thickness and nosing width, start by cutting your treads to width. A table saw is the easiest way to cut these planks, as they are typically 4’ long. Otherwise, use a circular saw and cut carefully, as you won’t have much room for error.
After you’ve cut them to the width, you’ll need to cut them to length. A laminate cutter works well, but that requires you to have a laminate cutter which most people don’t own. You can rent one, which is a cost, or you can simply use a miter saw, which most people do have. I use a fine-toothed blade for finishing cuts, which ensures a smooth cut without any tear-out.
Cutting risers is just the same as cutting the treads – cut them to width first and then to length. Remember to cut off the tongue end of the laminate risers. You want a flat top edge for your nosing to fit either on top of or over. The bottom of your riser should be the groove – if you leave the tongue on the bottom of your riser, you risk having part of the tongue exposed.
After you’ve cut your treads and risers, cut your nose pieces. Cut them to the same length as your treads and risers. Making cuts on narrow material on a miter saw can be awkward – make sure you hold it snug when you cut so it doesn’t move. Otherwise, use a finish hand saw and cut carefully.
5. Install Treads and Risers with Construction Adhesive and Nails/Screws
Install your treads and risers. Start at the top of your steps and begin with the first riser. You are going to glue the riser in place using construction adhesive. Before you do that, however, you are going to score all of your treads and risers with a utility knife. This will improve the adhesion between the laminate and subfloor.
You are also going to nail or screw your treads and risers to your subfloor. You can do this in a couple of ways. I have a cordless finishing nailer that leaves a very small indentation in the planks. If you don’t have one, you can simply use 2” finishing nails – also called 6d nails – around the edges. If you choose to nail, drill pilot holes first to help you drive the nails easily.
Make sure every laminate plank has a few nails or screws in it, on either side. You can cover up the nails or screws with wood filler later to match the color of your laminate. Screws will hold better than nails, but will also require more wood filler.
Once you’ve scored your laminate on the back, apply the adhesive in a serpentine pattern. This is the one time where you a little does not go a long way. You don’t have to saturate the laminate but apply enough so that all parts of the riser will adhere to the stair subfloor. Put nails or screws into the riser.
Now you can glue and nail or screw your tread. Apply the adhesive in the same fashion, and fit it snug up against the riser.
As you move down your steps, make sure your risers are not protruding up above the tread subfloor. Your nosing will sit on top of it, and if it isn’t flush to the subfloor, then the nosing won’t attach properly.
6. Install Laminate Nosing as per Manufacturer Recommendations
Some nosing will fit into the tongue of the tread and over the top of the riser. Others fit over the tread and sit in a metal bracket that you screw into the tread subfloor. You then glue the nosing and also screw it in.
Regardless of the method of installation, be aware that the nosing of your laminate stairs will endure, by far, the most abuse. Be sure to not only glue but also to screw the entire nose into the floor. Some nosing will allow you to screw from underneath, concealing the screw hole.
If your steps have a dip in the middle of the tread and you find that your nosing has some give to it in the middle of the step after installing it, you might want to put a small wood or plastic shim beneath it. Once glued and screwed, the shim should hold tight and keep your tread and nose from moving and becoming dislodged.
Advanced Tips for Installing Laminate on Stairs
As mentioned above, start at the top of the steps and move downward. Do the tread, riser, and nosing all at the same time. That way, if you make any mistakes, you won’t repeat them on any of the succeeding stairs.
While this might not sound appealing, I suggest measuring each tread and riser separately – don’t assume they are all of the uniform length. While you will more than likely find that they are, take the extra 5 minutes to measure each separately. If you find a tread that is ¼” wider than the others, then you can make that cut accordingly. If you don’t, you’ll have a ¼” on that tread for the life of the stairs.
You may need to level the subfloor of your steps – particularly the center of your stair treads. Years of feet thumping up and down the center of your stairs will wear down the centers compared to the stair edges. Wood or plastic shims work well beneath laminate to level it.
A more extreme solution would be to use a leveling compound, which is not easy to work with on stairs. More than likely, a small shim or thin plywood can secure your treads and nosing – just be sure to use a level when installing each tread.
How to Install Laminate Flooring on Stairs with a Railing
Installing laminate flooring on stairs with railings can be incredibly time-consuming if you have a staircase with spindles and banister on top. You’ll have to cut spindle holes out of each tread and then cut each tread into two. You’ll then fit them together on the tread and hope they fit snugly enough around the spindles to look like it’s still one tread.
By far, the easiest way is to remove your stair spindles. This can be tricky if they are glued or nailed into place. Spindles usually are held in place via round plug-like holes on the top and bottom. Sometimes they can be wiggled enough to dislodge them – but be careful because they can break off in their hole and then you are out of luck.
If you can’t remove the spindles, then here’s how you install laminate on stairs around a railing with spindles:
- Measure the tread size exactly as outlined above.
- Measure the exact placement of the spindles on the tread, marking it down on paper. You’ll need to measure the front, back, and sides of the spindle and its exact dimensions. Also, make sure you measure how far apart each spindle is on the tread.
- Create a replica tread using cardboard. Mark the exact dimensions on the cardboard. Use a utility knife to cut out the spindle holes – go slowly because precision is critical here.
- Then cut through the middle of each spindle hole, going in a straight line the width of the tread.
- Now you’ll transfer these two parts to a tread you’ve already cut. Using the cardboard on top of the laminate tread piece you’ve cut, mark out the spindle holes on the tread.
- Take one section of cardboard and draw a line on your tread that goes through both spindle holes.
- Cut your laminate piece along that line using a miter saw – a fine toothed blade works wonders here.
- Last, you’ll need to cut out the spindle holes on both tread sections. Use a jigsaw and cut slowly. Alternatively, you can use a finish saw and make many small, parallel cuts. Then use a small flathead screwdriver or chisel to remove the small cuts of material.
- When installing the tread, the two tread sections should fit snugly around the spindles. If not, use your handsaw or jigsaw to make slight adjustments.
Best Glue for Laminate Flooring on Stairs
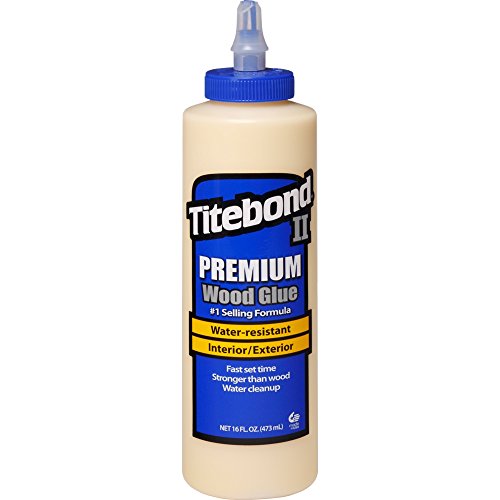 It may come as no surprise that the glue you use to adhere your laminate flooring treads and risers is probably the most critical material you’ll use during the job. The best glue you can use Titebond 5004 II Premium Wood Glue.
Titebond has a much lower water content than other wood glue. Glue with high water content tends to seep into the pores of the material it is adhering to, minimizing the effectiveness of the bond.
It is extremely tacky when handling, which means when you glue your laminate planks together, the initial bond is tight and you don’t have to hold it.
Arguably the best part of Titebond is that it is water-resistant. If you are putting your laminate stairs near an exterior door, then chances are water will eventually be carried in by wet feet or shoes. Titebond will not degrade over time due to moisture contact, ensuring your laminate steps don’t move.
Conclusion
When installing laminate flooring on stairs, remember to take your time since the process differs greatly compared to installing laminate on floors. Precise measurement is critical to making sure your stairs look great and fit properly.
Also, keep in mind that your stairs will suffer tons of wear and tear. Don’t be shy with your construction adhesive and consider using nails or screws to provide additional adhesion for your laminate treads, risers, and nosing.
Thanks for taking the time to review this article – if you have any questions, comments, or suggestions about how you installed laminate flooring in your house then please drop me a line. Best of luck with your next laminate stair project!