Whether you move into a house with engineered hardwood floors or pay to install them in your home, keeping them in exceptional shape is usually a priority. Engineered hardwood flooring is breathtakingly beautiful, but it can start to look dull and dingy as time passes. When that occurs, the first thing you usually want to figure out is how to clean engineered hardwood floors correctly.
Cleaning engineered hardwood floors properly isn’t overly challenging, but it is a multi-step process. You’ll need to sweep and vacuum to remove surface dirt and debris. Then, you’ll want to remove the remaining grime by mopping with the right cleaner.
However, other steps might be necessary, too, especially if you’re dealing with scratches. Here’s everything you need to know about how to clean engineered hardwood floors.

Contents (Jump to Topic)
- Why Does My Engineered Hardwood Floor Look Dull?
- How to Clean Engineered Hardwood Floors
- Can You Swiffer Engineered Hardwood?
- Can You Steam Mop Clean Engineered Hardwood?
- Can You Use Pine Sol on Engineered Wood Floors?
- Best Engineered Hardwood Floor Cleaner
- How to Remove Scratches from Engineered Hardwood Floors
- How to Protect Engineered Wood Floors
- Can You Refinish Engineered Hardwood Flooring?
- What Is the Best Way to Clean Engineered Hardwood Floors?
Why Does My Engineered Hardwood Floor Look Dull?
Engineered hardwood floors usually have a nice sheen, adding a bit of elegance to any space, but over time, that shine can dull.
Usually, the main reason engineered hardwood floors start to look dull is dust and dirt. As grime builds up on the flooring, it alters how light reflects off the surface. As a result, the floors can look dingy.
Using the wrong cleaning products, polishes, or waxes may also cause engineered hardwood floors to seem dull. If the products leave behind residue, they can trap dirt and dust. When that happens, it reduces the shine. If the cleaners harm the protective coating on your hardwood floor, it may also lead to dullness.
In some cases, scratches can also make an engineered hardwood floor look dingy. Again, this is because the changes to the surface alter how light reflects off the flooring. Plus, scratches can catch dirt and dust, further diminishing the look of your floor.
How to Clean Engineered Hardwood Floors

1. Sweep and Vacuum
One of the most critical steps you can take to clean your engineered hardwood floors is to sweep and vacuum. For sweeping, you’ll want a soft-bristled broom. That allows you to gently brush up any dirt and dust.
Alternatively, you can use a dust mop designed to collect dirt and dust without any cleaners. Dust mops are highly textured and feature soft fabrics on the surface. When swept across floors, dust mops trap dust, dirt, and hair, allowing you to get it off your flooring.
When you vacuum, opt for a lightweight model. Additionally, use a hardwood floor setting or attachment. Along with having soft pads, most hardwood floor settings and attachments provide better suction than you’d otherwise get, making them more effective at picking up dust and dirt.
2. Choose and Prepare the Floor Cleaner
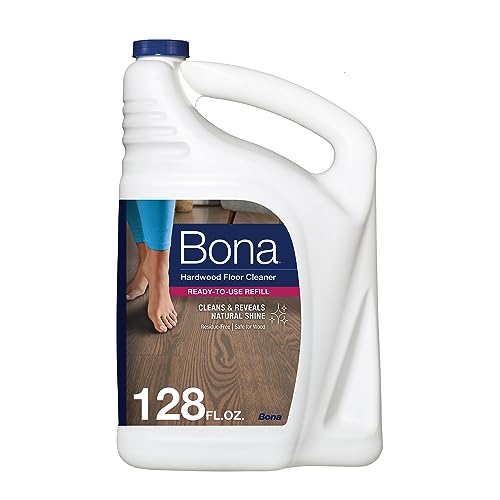
Several floor cleaners can work well if you have engineered hardwood floors. You can look for specialty products – like Bona Hardwood Floor Cleaner – to ensure it’s designed with your flooring type in mind.
Several multi-purpose cleaners are safe to use on engineered wood flooring. Pine Sol is one example, though you could also try Simple Green Multi-Surface Floor Care or other products. Make sure you choose an option safe for engineered hardwood and dilute the cleaner if it’s a concentrate, as using it at full strength can cause damage.
While some people recommend using a homemade white vinegar solution for cleaning engineered hardwood floors, others feel it’s the wrong choice. Vinegar is highly acidic, so while it’s effective at breaking down grime, it could damage the surface of your engineered hardwood flooring.
After selecting an appropriate cleaner, make sure you review the manufacturer’s instructions regarding use and preparation. Some cleaners need to be diluted, while others are safe to use as-is. Once you know how you’ll need to prepare it, create the solution in a bucket or put it in a spray bottle.
In many cases, the spray bottle method is easier. Along with allowing you to better control the application, it is easier to use a bucket of water solely for rinsing.
3. Mop Your Engineered Hardwood Floors
Once your cleaner is ready, it’s time to mop. If you’re using a spray, choose a soft, microfiber mop. Lightly spritz a small section of flooring, and run the mop across it moving with the grain to remove grime. Repeat the process until the entire floor is clean, rinsing as needed to ensure you aren’t reapplying dirt along the way.
If you go with a bucket, choose one with soft strands that you can wring out. By going with a softer option, you reduce the chances of scratches. By wring it out, you ensure excess water doesn’t end up on your flooring.
Dip the mop into the cleaner and wring out the mop. Then, gently move the mop across the planks going with the grain, focusing on a small area. Rewet the mop with cleaner and wring it again before proceeding. If necessary, rinse the mop in a separate bucket of clean water before going back to the cleaner and continuing.
4. Rinse the Floor [Optional]
Depending on the cleaner you choose, rinsing may not be necessary. However, if you’re concerned about residue or the manufacturer of the cleaner recommends a rinse, it’s better to take this extra step.
Use a bucket or spray bottle of clean water and mop the floor once more using it. Make sure to rinse the mop along the way, as that will help remove excess cleaner or any remaining dirt, dust, and grime from your flooring.
5. Allow the Flooring to Air Dry
After you finish mopping the floor, allow it to air dry. While it’s drying, avoid walking across the damp floor, as doing so can cause dirt and dust to stick to the floor.
6. Apply an Engineered Hardwood Floor Polish [Optional]
If you want to restore shine beyond what you achieve with a typical cleaning, you can apply a floor polish. Make sure it’s designed for engineered hardwood. Additionally, follow the manufacturer’s instructions regarding application processes and drying times.
Just keep in mind that polishes leave residue on your flooring. As a result, dirt and dust may become trapped on your floor more frequently, which could increase your cleaning requirements overall.
Can You Swiffer Engineered Hardwood?
 You can use a Swiffer on engineered hardwood floors. The Swiffer dust mops feature soft pads that aren’t likely to scratch your flooring, making them a good choice for light cleaning. Plus, you can throw the pads away when you’re done, which is more convenient than cleaning out a traditional dust mop.
Using a Swiffer Wet Jet on your engineered wood flooring is also an option. Make sure you use the wood floor cleaner designed to fit the mop, as other versions may not be suitable for engineered hardwood.
Can You Steam Mop Clean Engineered Hardwood?
In most cases, you should avoid using a steam mop to clean engineered hardwood floors. If the flooring is exposed to too much moisture, it can result in issues like warping. At times, excess steam can even cause the layers in the planks to start separating.
Ultimately, it’s best to limit water exposure when you have engineered hardwood floors. Along with skipping steam mops, you should make sure that any regular mopping doesn’t leave standing water on your floor. If you see puddles after mopping, wipe them up with a mop or microfiber cloth to avoid potential damage.
Can You Use Pine Sol on Engineered Wood Floors?
You can use Pine Sol on engineered wood floors. You’ll need to dilute the Pine Sol before you begin, as Pine Sol is sold as a concentrate.
Take a gallon of water and add ¼ cup of Pine Sol. Stir to make sure the cleaner is thoroughly distributed. Then, keep it in the bucket and mop using the instructions above.
If you prefer, you can transfer some of the solution to a spray bottle before you start mopping. If you go that route, simply spritz a small section of flooring and then mop, rinsing as necessary and repeating that process until your floor is clean.
After mopping, the manufacturer of Pine Sol does recommend rinsing the floor. As a result, you’ll need a bucket or spray bottle filled with clean water. Clean your mop thoroughly, then use the bucket or spray bottle to gently rinse your flooring.
Best Engineered Hardwood Floor Cleaner
 Several hardwood floor cleaners work incredibly well. However, many experts recommend Bona Hardwood Floor Cleaner. It’s designed for wood surfaces and is easy to use since it comes ready-to-go and in a convenient spray bottle.
Another popular option is Murphy Oil Soap Original Wood Cleaner. It’s a low-cost option since the cleaner is concentrated. Since you’ll need to dilute it, a single bottle can last quite a while, and it’s particularly effective at removing sticky residue and scuff marks.
Finally, the wood floor version of the Swiffer Wet Jet is a favorite option for anyone who wants to make cleaning convenient. It has a built-in sprayer; you simply throw the pads away when you’re done mopping. Plus, it gives you solid results.
How to Remove Scratches from Engineered Hardwood Floors
Clean the Floor Thoroughly
Before you start addressing any scratches on your engineered hardwood floors, you’ll want to clean them thoroughly using the process above (but without applying polish). This ensures that dirt, dust, and grime don’t impact the repair, leading to better results overall.
Try a Touchup Pencil or Marker
For minor scratches, the easiest solution is usually a touchup pencil or market. They’re available in a broad selection of colors, so select one that best matches your current flooring.
Usually, you’ll be able to find a solid match by going to a hardware store, as most of them carry touchup markers or pencils. Once you find the right one, review the manufacturer’s directions regarding the application.
While every product may have different instructions, they’re typically similar to one another. To cover it, you’ll gently run the touchup pencil or marker over the scratch. Then, use a microfiber cloth to buff the spot and blend it in.
Use Repair Putty
If you have larger scratches, you may want to try repair putty. Usually, this comes in engineered hardwood floor repair kits.
Another benefit of the kit is that they usually include blendable dyes, allowing you to customize the color to get the best match. However, you can also find pre-tinted putty, which may be a convenient choice if your flooring color is reasonably common.
Again, you’ll want to follow the manufacturer’s directions regarding the application. Typically, you’ll start by blending the color if you aren’t using a pre-tinted version. Then, you’ll use the provided plastic putty knife to apply the putty, keeping the knife at a 45-degree angle with the tip pointed slightly upward.
After rubbing the putty into the scratch and going over it with the putty knife a few times to smooth it, remove any excess with a paper towel before the putty hardens. There may be a buffing step after that, but you’ll want to check the instructions to see when it should occur.
Give Wax Filler Sticks a Try
For especially deep scratches, a wax filler stick might be your best choice. This works similarly to touchup pencils, but the process does require more effort.
In most cases, you’ll want to buy a wax filler stick kit, so look for one that has a wax that matches your flooring. Then, review the manufacturer’s directions regarding the application.
In most cases, you’ll heat the wax to make it pliable. Then, you’ll use a burn-in knife to apply it. Smooth the edges with the provided straight-edge tool, then buff the spot with a microfiber cloth to blend it into your flooring.
How to Protect Engineered Wood Floors

After cleaning your engineered hardwood floors and tackling any scratches, you’ll want to take extra steps to keep them in the best shape possible. Here are some tips that can help you protect your engineered wood flooring.
Place Mats or Rugs Near Entrances
Having mats or rugs positioned near the entrances of your home can help you keep your engineered hardwood flooring clean. The fabric can trap dust and dirt that accumulates on shoes, making it less likely that you’ll track it inside.
Just make sure that you clean the mats and rugs regularly. By sweeping and vacuuming them, you can remove any dirt or dust they collect, ensuring it doesn’t end up on your floors.
Remove Shoes Before Entering
Another important step you can take is to remove your shoes when you’re in the house. By taking them off near the entrances, your shoes won’t bring in any dirt and dust. Rocks or objects stuck in the treads won’t get dragged across your engineered wood floors, reducing the odds of scratches.
Use the Hard Floor Setting When Vacuuming
Vacuuming with the hard floor setting (or a hard floor attachment) is more effective when cleaning engineered hardwood floors. Often, it creates better suction, allowing the vacuum to more effectively remove dust and dirt.
Plus, many hardwood floor settings and attachments have pads that prevent scratches. As a result, your chances of harming your flooring while vacuuming go down significantly.
Vacuum and Sweep Consistently
Since built-up dust and dirt can make your engineered wood flooring look dull, regular sweeping and vacuuming are essential. Precisely how often you want to sweep and vacuum may depend on the amount of traffic you have, whether you have pets, and other factors. For some households, once a week is a necessity, though others may be able to wait longer.
When you sweep, opt for a soft-bristled brush. You could also use a dust mop or disposable microfiber sweeping pads instead, as they can give you similar results.
For vacuuming, use a lightweight vacuum, as heavier models are more likely to scratch your flooring. Additionally, choose the hard floor setting or use the hard floor attachment for better suction.
Clean Spills Immediately
Spills can harm your engineered hardwood floors in several ways. Moisture can damage the finish and underlying material, so you want to avoid standing puddles as much as possible. By cleaning the spill up immediately, that isn’t typically an issue.
Additionally, if a spill is sticky, it can collect dust and dirt. Use a dry cloth or microfiber mop to soak up as much of the spill as possible. Then, gently mop the area if any residue remains.
Use Protective Pads on Furniture
Scratches can happen when you drag heavy furniture across your engineered hardwood floors. If you want to avoid that, apply protective pads to each foot on furniture pieces you may need to move. The pads allow the furniture to glide across the floor and don’t feature sharp edges that could lead to scratches.
When you choose protective pads, look for products designed for hardwood floors. Some versions are designed for carpets instead, so you want to make sure you select the right option. Then, apply them by following the manufacturer’s directions.
Avoid Abrasive Pads or Cleaners
Any abrasive pads, sponges, or cleaners can scratch your engineered hardwood floors. Along with making your flooring look dull, they can harm protective coatings and finishes, leaving your flooring vulnerable to other kinds of damage.
Instead, rely on gentle cleaners designed for engineered hardwood. Additionally, stick with soft cleaning tools, like microfiber cloths and mops.
Can You Refinish Engineered Hardwood Flooring?

In many cases, refinishing engineered hardwood flooring is risky at the best of times and may be impossible depending on the construction of the planks. Engineered hardwood floors aren’t solid wood. Instead, the top layer is a hardwood veneer, and it’s usually only a few millimeters thick.
Whether refinishing is an option depends on the thickness of that top veneer. Usually, the first step of the refinishing process is sanding the floor. If the veneer is too thin, you can accidentally sand all of the way through it, revealing the underlying plank materials.
If the top veneer on your engineered hardwood floor is more than 2 mm thick, then refinishing may be possible if you avoid sanding down too far. However, that’s still considered risky, particularly for those without floor refinishing experience. As a result, you may want to work with a professional to ensure the work is handled correctly.
If the top veneer is less than 2 mm thick, then it’s best to assume that refinishing isn’t an option. The odds that you’ll sand through the veneer completely are high in this situation, and if that does occur, there’s nothing you can do to restore the look of your flooring aside from replacing it.
Typically, you can find out about the thickness of the veneer by looking at the original floor packaging or consulting the manufacturer’s website. However, this approach is only ideal if you know the flooring has never been refinished.
If it was installed by a past owner and you don’t know if they’ve refinished the floor, then there’s a chance that’s occurred. As a result, the veneer in its current state may be thinner than you’d expect, leading to issues if you attempt to refinish your engineered hardwood flooring.
What Is the Best Way to Clean Engineered Hardwood Floors?
Ultimately, the best way to clean engineered hardwood floors is to use a multi-step process. Sweep and vacuum regularly. Choose the right cleaner for the job, go with softer mops, and address any scratches quickly to restore the look of your flooring. That way, you can remove dust, dirt, and grime while avoiding scratches and residue, ensuring your engineered hardwood floors always look their best.
Did you learn everything you wanted to know about how to clean engineered hardwood floors? If so, please let us know in the comments below. Also, if you know anyone with engineered wood flooring that could benefit from the information in this article, make sure to share it with them.