Polyurethane is a wood finish that adds beauty to deck flooring, kitchen cabinets, tabletops, and many other wooden surfaces. Not only does the result appear stunning, but the finish also protects against moisture and seals even scratched surfaces. Most people apply polyurethane with a brush, but can you roll on polyurethane?
You can roll on polyurethane rather than use a paint brush. It’s an excellent finish for floors and other wooden surfaces. Using polyurethane with a roller includes multiple benefits, such as eliminating brush strokes and over-application or getting the project done fast.
In this article, we’ll show you the steps you need to use a roller with polyurethane. The following information is a guide to help you create a shiny polyurethane finish without causing harm to yourself or the environment.

Contents (Jump to Topic)
- Can You Roll On Polyurethane?
- Reasons to Use a Roller with Polyurethane
- How to Apply Polyurethane With a Roller
- What Type of Roller Do You Use for Polyurethane?
- Can You Apply Oil-Based Polyurethane With a Roller?
- Best Roller for Polyurethane
- Can You Apply Too Many Polyurethane Coats?
- How Many Layers of Polyurethane is Best?
- How to Properly Dispose of Polyurethane
- Summary
Can You Roll On Polyurethane?
You can use a roller with polyurethane. Using a roller is highly recommended if you’re working with water-based polyurethane, some oil-based options, and moisture-cured poly finishes. Doing so even comes with many benefits. For example, it helps finish multi-direction or wood floors well. The primary downside is that rollers are not ideal for covering corners or crevices.
Reasons to Use a Roller with Polyurethane
Polyurethane is a popular choice for finishing wood. Using polyurethane with a paint roller can help speed up the process, especially in large surface areas like wooden floors. Rollers are much faster and work better than brushes as your application method because they don’t leave brush marks and prevent you from over applying the finish.
There are many benefits to using a roller with polyurethane. However, the biggest downside is that rollers are not effective at covering corners, curves, or joints. You may need to go over these areas with a handheld paint brush.
Pros:
- Dries faster
- Smooth finish
- Eliminated brush marks
- Prevents over-application
- Full coverage on broad surface areas
- Ideal for modern finishing materials, like decorative liquid plaster
Cons:
- High-quality rollers cost more than a paintbrush
- Rollers are not excellent for painting curves, joints, or corners
How to Apply Polyurethane With a Roller

When applying polyurethane with a roller, you must wear protective gear. Polyurethane is incredibly toxic and dangerous, whether it’s water or airborne. You will need latex gloves and a face mask or ventilator to protect you from the chemicals. Wear goggles and a thick protective suit to keep your eyes and body safe.
Step 1: Prepare Your Materials
After you have your protective gear on, prepare your materials. Add two cups of mineral spirits to a paint pan, and pour the polyurethane into a separate paint pan. Make sure not to get the chemicals in your lungs or on your hands. Place the two pans in your work area, where they are readily available.
Step 2: Dip the Roller in Mineral Spirits
Dampen the paint roller by dipping it in the pan with mineral spirits. Shake off the excess. Your roller should not drip mineral spirits. This step helps apply the polyurethane smoothly.
Step 3: Dip the Roller in Poly
Dip the same roller in the pan of polyurethane immediately afterward. Dampen the roller’s surface. You will use this mix for your first finish layer.
Step 4: Apply the First Coat
Use the mineral spirit and polyurethane coated paint roller to apply the first coat on the surface you want to finish. Roll on the mixture quickly. Continue covering the surface area until the roller is clean. Then, allow the layer to dry completely. Check the polyurethane’s label for an exact dry time.
Step 5: Repeat as Needed
When the first polyurethane is dry, repeat steps two to four if you need to re-apply the first coat. You may want to repeat this step if the first coat does not seem to have a decent seal. Allow the layer to dry before moving to the next step.
Step 6: Sand the Surface
When the first coat is dry, sand the surface using 280-grit or higher sandpaper. The goal is to roughen up the first polyurethane coat so that the additional coats adhere thoroughly. You can use a cloth with mineral spirits to remove sand or dust from the surface area.
Step 7: Store Your Roller in Between
After applying the first coat of polyurethane, you may need to store your roller somewhere while you sand the surface. Dip the paint roller in your mineral spirits pan and dampen the entire roller. Shake off the excess, and put the roller in a freezer bag until it dries. Allow the pan to air dry as well.
Step 8: Paint on Additional Coats
When you’re ready, repeat steps two to seven to apply each coat of polyurethane. Allow each layer to dry in between, making sure to remove the poly from the roller each time. Three coats of polyurethane are typically ideal. However, you may need more coats for full coverage.
Step 9: Clean Up
You may be able to use soap and water to clean some water-based polys, but never if it’s oil-based. The clean-up process is crucial because polyurethane is not safe to dispose of the same way you would with water-based acrylic paint. Start by washing the paint roller with hot water to remove the poly and mineral spirits.
Next, you need to clean the paint pans. After you allow them to completely dry, even if there is a bit of poly or mineral spirits left in the pan, remove the dried matter from the pans. A flathead screwdriver should help you remove the material. Then, you can run the pans under hot water.
Excess polyurethane requires careful disposal. Pour any extra poly into a metal or plastic container with a tight lid. Then, throw the polyurethane in an outdoor trash can. Never pour leftover polyurethane back into the original container.
Finally, wash the pan in hot water. You can dry and reuse the roller and pans or dispose of them. If you don’t want to keep the paint pans, dispose of them in your outdoor trash can. Otherwise, you could store them in your garage for future projects.
What Type of Roller Do You Use for Polyurethane?
There are a wide array of rollers available in stores and online. They come in many textures, making them ideal for certain applications. For a smooth polyurethane finish, you want a soft roller. A smooth roller is excellent for flat surfaces.
When working with polyurethane, look for a lambswool or fiber paint roller. These are the best options because they prevent dust and lint from mixing with the finished surface. They also provide a smooth, sleek finish for hardwood flooring.
However, the type of roller you use may vary based on the wood condition and the polyurethane type. Urethane is available in water or oil-modified solutions, and your applicator should go with the type you choose. Specialized rollers may work better for specific wood conditions as well.
You can also use any foam roller by wrapping it in plastic, then with a cloth. The homemade applicator works perfectly for wipe-on polyurethane finishes and helps lay down polyurethane without lap lines. More importantly, it keeps the roller from absorbing the liquid, which also makes clean-up easier.
To wrap a roller, keep the plastic wrap in place with a sealed baggie. Then, cover it with lint-free cloth like an old t-shirt. Stretch the ends to overlap around the roller toward the handle.
Can You Apply Oil-Based Polyurethane With a Roller?
You can use a roller to apply some oil-based polyurethanes, but not all. Oil-based poly is designed to bring out the wood’s natural grain, so most people use a natural bristle brush.
Best Roller for Polyurethane
A soft, high-density roller is the ideal option for polyurethane. Look for lambswool, fiber, or foam rollers that are four inches long for the best results. However, the size of your roller may vary based on the surface area you plan to cover. You can find rollers available in 12, 18, 24, or 36 inches as well.
Finest Finish Paint Roller
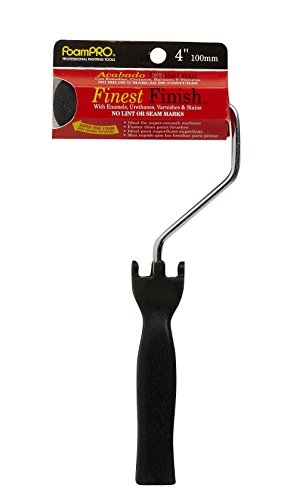 The Finest Finish Paint Roller is a four-inch foam high-density roller. It won’t leave lint behind, and the size makes the application process quick and easy. You can better cover corners or provide a spray touch-appearing finish. Plus, the foam holds the finish for a long time, allowing you to create a clean, streak-free surface.
You can even reuse this paint roller for other projects. It’s great for painting or varnishing any wooden furniture.
The foam also helps reduce the likelihood of drips and is super easy to clean later. The roller washes clean with ease, allowing you to use it many times.
FoamPRO 164 Fine Finish Roller
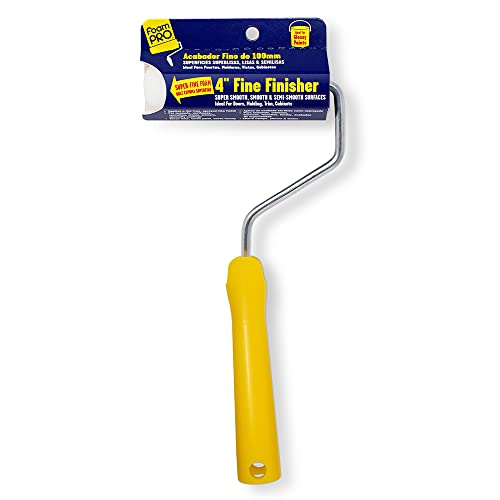 The FoamPRO Fine Finish Roller is another high-density foam roller that’s great for applying oil-based polyurethane. It’s available in two, four, or six inches.
This roller is the best choice if you’re working on a smaller project, like refinishing kitchen cabinets or a wood table. The roller maneuvers well in narrow spaces and provides a clear, smooth surface with no lint.
The foam applicator absorbs poly thoroughly, preserving the moisture long enough for you to complete your project. Plus, the frame and roller cover included are reusable. You can paint, stain, varnish, or apply polyurethane with the paint roller.
Can You Apply Too Many Polyurethane Coats?
You can apply many layers of polyurethane if you cover the entire surface and sides of the wood. Otherwise, moisture could get underneath and cause the wood to bulge over time. Too many coats of polyurethane may cause similar bulging.
How Many Layers of Polyurethane is Best?
The best results come when you apply three layers of polyurethane for a wood floor, especially if you use an oil-based polyurethane. The first coat should mix with mineral spirits to create a barrier between the wood and the finish, like a sealer. A bristle brush is ideal for this step. Then, you can use a roller to apply the subsequent two layers of polyurethane.
How to Properly Dispose of Polyurethane
Be careful how you dispose of polyurethane. It’s not biodegradable, and the smoke emits highly toxic substances that can ignite, so polyurethane is not ideal for burning or throwing down the drain. However, the material does become easier to dispose of when it dries to a hard material.
To properly dispose of polyurethane, make sure to seal the leftover liquid or dried matter in a plastic or metal container or can with a lid. Then, throw it in the trash. Never pour polyurethane down the drain or directly into the garbage.
If you wrapped a foam roller in plastic and cloth before applying the poly, clean-up is easy. You’ll need mineral spirits for any wet polyurethane. Throw out the fabric when you’re done and use mineral spirits to wipe off the plastic wrap.
Summary
You can use a roller with polyurethane, whether it’s oil or water-based. Most types of poly look great when you roll them on. However, you should check the finish’s label to make sure the materials you use are compatible. Rollers help create smooth, sleek results on wood surfaces. They’re a great way to cover a large surface area, in particular, like a floor.
Did you find the information you need to complete your polyurethane finish? If you enjoyed learning how to roll on poly, please let us know. Share our article with your friend and leave us a comment.