If you’re looking at painting basement ceiling ideas online, whether yours is finished or unfinished, you may have come across painted exposed basement ceilings.
Painting an exposed basement ceiling black, white, or gray is a newer trend. The process involves painting the ceiling and ductwork, leaving the wires exposed. It’s a popular way to make a short ceiling look taller or create a classic industrial aesthetic in your home.
In this article, we’ll show you the ins and outs of painting an unfinished basement ceiling. Learn the steps to tackle your project, the benefits of exposed ceilings, and how to choose the right color for your basement.

Contents (Jump to Topic)
- Can You Paint an Unfinished Basement Ceiling?
- Benefits of Painting Exposed Basement Ceiling
- What Color to Paint Exposed Basement Ceiling?
- What Is the Best Way to Paint the Ceiling?
- How to Paint Unfinished Basement Ceiling
- Do You Need to Prime a Basement Ceiling Before Painting?
- Step 1: Inspect and Secure Pipes and Venting
- Step 2: Remove the Ceiling Insulation
- Step 3: Bundle and Secure Wiring
- Step 4: Trim Ceiling Nails
- Step 5: Fill Gaps with Foam Insulation
- Step 6: Clean the Ceiling
- Step 7: Tape Off Areas You Don’t Want to Paint
- Step 8: Protect the Floors (and Yourself)
- Step 9: Apply Primer
- Step 10: Spray Basement Ceiling
- Painted Basement Ceiling Before and After
- What Kind of Paint Do You Use for an Exposed Basement Ceiling?
- Best Paint for Basement Ceiling
- Tips for Painting a Basement Ceiling
- Conclusion
Can You Paint an Unfinished Basement Ceiling?
When you finish a basement or repaint the ceiling, most people usually put drywall on the walls and ceiling to create a look that mirrors traditional rooms in a home. However, you can paint an unfinished basement ceiling for a massive impact on the space.
You can also cover the pipes and ductwork in your basement with paint. In fact, doing so allows them to nearly disappear from view. It’s typically okay to paint copper pipes, PVC pipes, and soft pipes, as well as ducts and all-metal ductwork. Make sure your paint is ideal for the surfaces you want to cover, and prime the surface before painting to ensure it sticks.
That said, you should consult your village ordinances or codes to make sure painting the pipes, wires, and ductwork is acceptable in your area.
Benefits of Painting Exposed Basement Ceiling
There are many reasons for painting your exposed basement ceiling. Here are the most popular benefits.
Accessibility
By keeping the basement ceiling open, you have much easier access to the HVAC ducts, plumbing, pipes, and electrical wiring in your home. You only have to reach up and fix what you need to if something breaks, it’s time to perform maintenance, or you choose to tackle another home improvement project later.
Another fantastic benefit to the accessibility you gain with an exposed basement ceiling is that you can save time and money later. For example, you won’t need to tear down and replace the drywall if you’re not finished working on your house. Some people also have hard water, so fixing the popes is inevitable. Accessibility means you can reach the pipes with ease.
Gain Visual Height
When you leave the basement ceiling exposed, you also add a little more ceiling height than if you drywalled the ceiling. Many old houses have particularly low ceilings. Drywall only lowers ceilings by around an inch, but when your ceiling is already too low, leaving it open will make the space feel like you added height.
The floor joists’ vertical lines also trick the eye into thinking the ceiling is higher. The walls don’t actually gain height, but they appear to do so. If you have a low basement ceiling already, consider painting the exposed ceiling instead of using drywall.
Aesthetics
The industrial look is trendy today, especially when it comes to exposed ceilings. If you enjoy a modern, industrial appearance, try it out in your home. Painting exposed pipes and ductwork also looks better.
Budget-Friendly
Drywall is much more expensive than painting a ceiling yourself. If you plan to pay a professional, you may not save much cash. However, DIYers that already have a sprayer only need to purchase the primer and paint.
Increased Lighting
When you paint a ceiling white, you can boost how much light reflects around the room. The white paint makes it seem like a room void of natural light is brighter and larger. You can also use white ceiling paint to reflect other colors on the basement walls. For example, deep red wall paint appears slightly rose-colored on the ceiling.
Time-Saving
Painting an exposed ceiling is much faster than putting up drywall. If you use a spray gun, you could cover the basement ceiling in a couple of hours. Even if you apply a second coat, you only have to wait a few hours for each layer to dry. However, setting up drywall can take days to finish. It also comes with more elbow grease and neck aches.
Pest Control
By having an exposed basement, you are less likely to deal with pest control issues in the future. For an unfinished ceiling, you would typically remove the insulation or leave the rafters bare. The result leaves nowhere for pests to nest.
What Color to Paint Exposed Basement Ceiling?
With so many colors available, what color is the best for an exposed basement ceiling? You’re really only limited by your imagination. However, most ceilings are white, black, or gray. Here are the benefits of each color.
White

White is a top choice for ceilings because it boosts the amount of light in the room. If your basement is too dark, consider using white to reflect more light throughout the area. White paint also allows you to play around with color. You can use the ceiling to reflect bright colors throughout the space and truly brighten your home.
However, white paint typically requires more coats. If you have flaws to hide, white may not be the choice for you. The paint also requires you to use a special primer to keep the color from yellowing over time.
Black
You may think that black is too dark for a dark basement. However, the color offers tons of perks. For example, black ceilings hide everything. They’re excellent for basements in older homes because the paint hides any flaws and creates a sleek appearance. The seamless color transition between wires and pipes helps it all blend.
Many people also adore black ceilings because they allow other colors in the space to pop. You can use bright furniture and decor to make the basement feel cozy.
The downside is that black does make the ceiling appear lower to the naked eye. If you have a basement with zero light, it may also be too dark for your preference. Another con is that dust and cobwebs stand out more against a black ceiling.
Gray

Gray is an excellent compromise if you’re having trouble deciding between white and black. The color is lighter than black, which works better in dark basements. It also covers better than white paint, meaning you won’t have to use as many paint layers. Gray could cut down on your painting time and allow you to hide flaws without reducing light.
You may have more color options with gray. Gray paint comes in many shades. You’re also more likely to find shades of gray paint mixed with another color. For example, a gray/aqua shade allows you to boost the amount of color in a dark and drab basement.
What Is the Best Way to Paint the Ceiling?
The two main ways to paint a ceiling are to paint by hand with a brush or roller or use a spray gun to apply the paint. The easiest and fastest method for painting a ceiling is with a spray gun. However, painting the ceiling by hand allows you to save money.
By Hand
You can paint an exposed ceiling by hand using a paint brush or roller. However, the job will take a considerable amount of time. Painting a flat ceiling is 10 times shorter than covering the rafters, pipes, and ducts. The rough surface of the wood may also require more paint coats.
If you only plan to paint the ceiling, you may want to ask a team of painters to help you cover the surface by hand. However, painting the entire room or unfinished surface doesn’t require such a careful hand and precision.
With a Spray Gun
If you live in a house with many wires, pipes, nooks, and crannies, it’s best to spray the paint onto your ceiling. Spraying paint with a spray gun creates a smooth, even finish.
The process also takes much less time. You don’t need to hold the paint roller over your head or refill the paint bucket every few minutes with a sprayer. You could spray paint an entire basement in a couple of hours while painting the ceiling with a brush could take days.
Another bonus to using a spray gun is that you might be able to get away with fewer paint coats. You could cover the ceiling in a single coat. Keep a roller nearby to touch up any drips before they dry, and plan to complete a few touch-ups with a brush when you’re done. Otherwise, you’ll need to paint on a second layer to smooth out drips or other flaws.
The biggest downside to using a spray gun to paint a ceiling is the considerable mess. Plan to deal with overspray and protect yourself and any areas you don’t want to paint carefully. You’ll need to collect goggles, eye protection, and protective clothing.
If you don’t already have a spray gun, the price may hold you back from sprayable paint. Large sprayers are an excellent investment if you complete home improvement projects regularly. But if you don’t plan to use the sprayer again, it may not feel worth buying to you.
How to Paint Unfinished Basement Ceiling

Before you start painting the ceiling, collect your materials and decide if you will paint by hand or use a sprayer. A spray gun is a one-person job, whereas many people could paint an exposed ceiling with paint brushes simultaneously. Either way, here are the steps to follow.
Do You Need to Prime a Basement Ceiling Before Painting?
Priming the basement ceiling before you paint is highly recommended. Primer allows the paint to stick to various surfaces better, which is ideal in painting exposed wood rafters, pipes, wires, and ductwork. Using primer also allows you to reach lighter paint colors with ease. For example, painting a black ceiling white is much more doable with primer.
Step 1: Inspect and Secure Pipes and Venting
Before you jump into painting the ceiling, check out the pipes and vents. Make sure they’re secure and do not require any maintenance. Houses can shift over time, allowing pipes and venting to become loose. Refasten or adjust them as needed. Hardware stores have pipe, venting hangers, and wire you can attach to the wood beams for added security.
Step 2: Remove the Ceiling Insulation
If your basement ceiling has insulation, now is the time to remove it. Unfinished basements can skip this step. Fill the gaps with spray insulation if you need it, then trim it down using a razor blade when it dries to a smooth surface. You may need several coats for ideal coverage.
Step 3: Bundle and Secure Wiring
Some basements have wiring that runs in different directions. Collect the cords and cables, securing them together or against the rafters with wire staples or zip ties. Making them look organized will produce an organized appearance and cleaner paint job.
Step 4: Trim Ceiling Nails
If your unfinished ceiling has long nails sticking down from the floor above, you may want to trim them with a rotary tool like a Dremmel. Keeping the nails flush with the ceiling helps with the painting process. It’s also much safer to avoid sharp objects near your head.
Step 5: Fill Gaps with Foam Insulation
Fill any areas with cracks or gaps using foam insulation. Doing so creates a smooth surface and helps with the resulting paint job. It also closes off access to any nooks and crannies near the ceiling or basement window wells that you’d rather keep closed.
Step 6: Clean the Ceiling
Use a broom, scrub brush, or ShopVac to clean the ceiling thoroughly. Remove any dirt and debris before you start painting, or the paint may not stick to the surface well. A vacuum could also help you remove cobwebs.
For an extremely dirty basement, try using an air compressor with a blow sprayer attachment to blast the dust away. It’s messy, but it’s a great way to clean cinder block walls. Sweep up the debris that falls to dispose of it.
Step 7: Tape Off Areas You Don’t Want to Paint
Paint gets everywhere when you paint a ceiling. Use painter’s tape to protect anything you don’t want to paint. For most people, this step includes windows, light fixtures, and doorways. You also want to avoid painting electrical outlets, junction boxes, the electrical box, furnace, shut-off knobs, and any other hardware you must turn off or on.
Step 8: Protect the Floors (and Yourself)
If you complete your painting project before the basement has walls and floors installed, you could make a mess without worry. However, if the walls and floors are not going to be painted too, you need to use contractor’s paper or drop cloths to protect them. Tarp anything you can’t remove from the room, including the finished walls, flooring, and light fixtures.
You may want to turn off the electricity in the room and wrap the lights in plastic bags to avoid getting paint on them. You would need to find an external lighting source to complete your project, however. Another method you can use to avoid this step is to spray the paint without wrapping the lights and replace them when the project is complete. Turn off and cover the furnace to protect it from paint.
You also need to protect yourself, especially if you use a spray gun to apply the ceiling paint. Wear safety goggles with side coverage to keep the materials from your eyes. A paint sock for your head can also help protect the sides of your safety glasses and hair. Cover your clothing and shoes with a paint suit or wear specific painting clothes you plan to ruin. Wear latex gloves and something over your hair.
The most important thing is to protect your lungs. Paint fumes cause serious irritation. They mainly irritate your throat, nose, and eyes. But in a basement where airflow is less likely, incorporating fresh air or wearing a respirator is highly beneficial. Breathing the fumes for too long could cause dizziness, headaches, and nausea.
Avoid worrying about overspray too much. Latex paint is typically easy to clean using soap and water. If you miss or drip, you can always fix the mistake later.
Step 9: Apply Primer
Apply primer to the rafters, pipes, ducts, ductwork, and wires you plan to paint. You can choose to leave black wires alone if you’re painting the ceiling black to match. However, a silver metal pipe will stand out on the ceiling. Primer allows the paint to adhere to varying surfaces. Just make sure the primer you use matches your paint and surface needs.
With white ceiling paint, you also need to seal the wood using a strong primer to avoid yellowing over time. Look for a shellac-based primer to seal wood tannins. Otherwise, the knows will show through the paint and cause yellowing.
For a black ceiling, go with a gray-tinted primer. The color provides more coverage.
Spray the primer on the ceiling, covering the pipes and ductwork. Move the spray gun quickly and evenly. You can spray at any speed as long as you move your entire arm, rather than the wrist only. Staying in a single area for too long will cause drips. You may need to allow the first coat of primer to dry and apply another. Leave the primer to dry before painting.
When using primer, you may also need ammonia to clean it off your brushes, rollers, or spray gun.
Step 10: Spray Basement Ceiling
Finally, it’s time to paint. The primer should allow you to use less paint on the rafters and beams, but most exposed ceilings take around three coats of paint for full coverage. You may want a step ladder to reach all the edges.
If you’re using a spray gun, spray the paint on the ceiling using the same process as the primer. You may use a paint brush or roller to cover the area by hand, but the process takes much longer. Either way, allow each coat to dry before adding another. Go back over the area when you’re done to make sure you didn’t miss any spots or smooth any drips.
Painted Basement Ceiling Before and After
Are you wondering what painting an exposed basement ceiling may look like? Should you use light or dark paint? The following includes a few before and after photos of projects in white and black paint. Use the images to help you decide on your preferences before you start painting.
Before
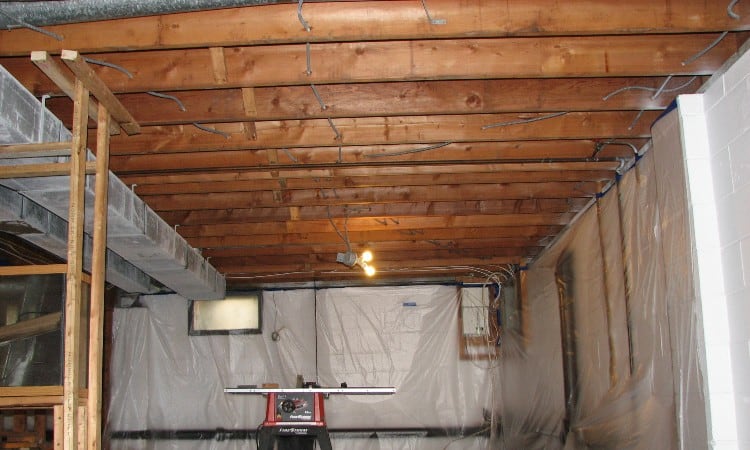
The before shot above shows what an unfinished basement looks like just before painting the ceiling. Notice how the wood rafters and cinder blocks are clean. There are no cobwebs or other debris to get in the way. The walls, windows, and a portion of the floor are also tarped to avoid overspray or drips.
White Ceiling After

After painting the exposed ceiling white, a dark basement appears much brighter and cleaner. The image above shows white paint on the rafters, wires, and some of the pipes. The pipes along the bottom of the room are painted black for contrast and a fun appearance. They also match the dark window frames and flooring.
Black Ceiling After

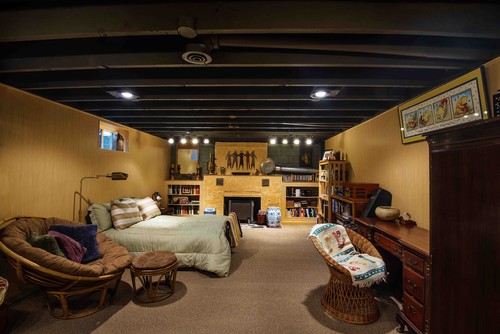
A black ceiling, like the one in the above picture, hides any flaws in the wood rafters and adds an aesthetic appeal to the basement. Similar to the previous white ceiling image, the wires and ductwork are painted black to match. The black pipe that runs along the middle of the white walls creates a border-like effect that many people enjoy in a basement.
What Kind of Paint Do You Use for an Exposed Basement Ceiling?
Latex, sprayable paint is a go-to for exposed basement ceilings. You can use latex paint for a variety of surfaces, from wood rafters to metal pipes. Look for an eggshell or flat finish for the best results. Any paint with a high sheen will show flaws in your ceiling, and most basement ceilings have a ton of flaws.
You might also want to find an option with paint and primer combined. Some sprayable paints come with this feature.
Never use spray paint on your basement ceiling. Sprayable paint is less toxic and safer for the project. Plus, you would need to use hundreds of cans of spray paint to complete the paint job.
Best Paint for Basement Ceiling
While there are many ceiling paints on the market, the best paints for your basement ceiling will include special features like 2-in-1 primer and paint, low odor, or extra spatter resistance. The following are our top picks for the best paint options to use on an exposed basement ceiling.
Glidden Interior Latex Ceiling Paint
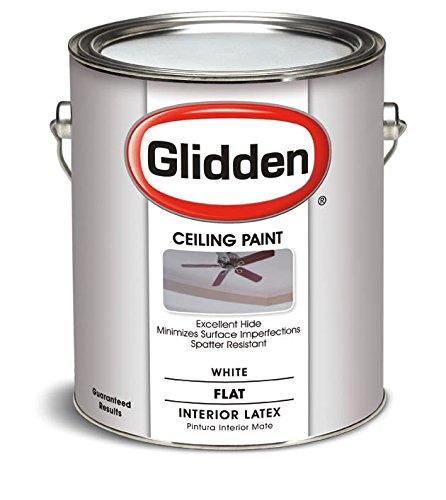 This Glidden Interior Latex Ceiling Paint is a flat, white-gray paint. It offers excellent hiding features to cover stains, yellowing, dark paint, or other minor imperfections – all of which are common in basements. The formula is low in odor, and it has added spatter resistance to keep the paint from dripping on you.
The paint is white with a slightly gray undertone, which helps boost the hiding factor. This feature makes Glidden perfect for anyone debating between white or light gray for an unfinished basement ceiling. It’s also watery enough to apply using a spray gun.
Rust-Oleum 260967 Ceiling Paint
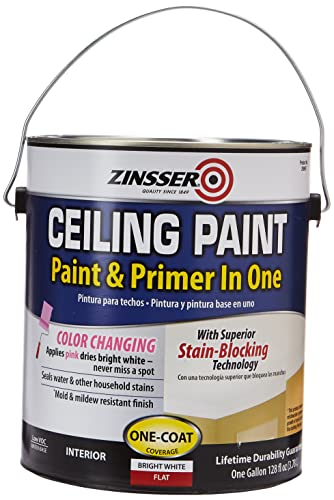 Rust-Oleum is an industry leader. Their Zinsser ceiling paint has stain-blocking features. The paint includes primer, so you can expect to save time and money on your project. The flat, matte finish looks excellent in an unfinished basement, and the paint seals in stains from water and other sources. You can apply it to wood, metal, and other surfaces.
Another fantastic feature comes with the application process. When applying this Rust-Oleum Ceiling Paint, it glides on in a pink shade and dries to white. Doing so allows you to see exactly where the drips are in a poorly lit basement, and you’ll always know which area of the pipe or ceiling you have already painted.
Tips for Painting a Basement Ceiling
Here are a few last tips for painting a basement ceiling:
- Purchase an airless paint sprayer
- To save money, buy a 5-gallon paint can
- Cover yourself with an environmental bunny suit
- Paint the entire space the same day, ceiling, walls, pipes, wires, and ductwork
- Black paint requires less paint for better coverage
- Go with white paint to create a bright space in an otherwise dark basement
- Blue painter’s tape does not stick well to concrete walls
- Expect taping the room to take much longer than painting if you use a spray gun
Conclusion
Painting an exposed basement ceiling white, black, or gray is a new trend. However, you have many ways to go about the process. There are multiple pros and cons to each. Depending on your space, it may even help you save time and money on your home improvement project. The best choice will depend on your space and the design aesthetic you hope to achieve.
Did you find all the steps you need to paint your exposed basement ceiling? If our articles helped with your project, please let us know in the comments. Share our tips with your friends so that they can create stunning basement spaces as well.