When you first install your tile flooring, that magnificent shine is often one of the best parts. The problem is that, over time, that shine dulls. Soon, you find yourself stuck with floors that are anything but inspiring, leaving you wondering how to make floor tile shine once more.
In the vast majority of cases, the best way to make floor tile shine is with a thorough cleaning. Soap and water or a vinegar solution can work well, as well as processes using baking soda or ammonia. You could try a high gloss sealer, too.
Which of the above options is best for your floor can depend on the material and condition. Here’s what you need to know about how to make floor tile shine.

Contents (Jump to Topic)
Why Does My Tile Floor Look Dull?
Tile floors can start looking dull for a few reasons. One of the most common culprits is built-up dirt and grime. Without regular, thorough cleanings, any accumulated dust and dirt can alter how light reflects off your floor, leaving them looking dull.
Another typical cause is that the polish on many tile floors can wear off over time. Natural shine can diminish through wear and tear. As you walk across the floors, it can cause small scratches, which also change how light reflects off of your flooring.
The same goes for any tile sealers that were creating the high gloss look. Those topcoats wear down as you move across them, eventually getting thin enough to leave the underlying tile exposed. If that tile is matte, your floors may look dull.
How to Make Tile Floor Shine

If you want to make your tile floors shine, several approaches may work well. The method you choose may depend on the type of tile. Certain tile materials – including porcelain and many stones – are sensitive to acids, bases, or both. That means some options aren’t universally appropriate.
For sealed tile floors, you’ll also need to make sure that your method is compatible with the sealer. Again, some may not respond well to certain products, so choose the suitable option for your flooring.
However, regardless of your strategy, you should always begin by sweeping and vacuuming. That removes loose dirt and debris, giving you the best possible start for all options below.
Additionally, make sure to put on gloves. You may want to use eye protection, too. Also, ensure good air circulation, particularly if you’re using ammonia.
1. Soap and Water
Add Dish Soap to Water
Mild liquid dish soaps are an effective way to clean many tile floors. Usually, all you need to do to create the solution is add a few drops to a bucket or spray bottle filled with warm water. Then, mix until you see a lather.
Apply the Soap Solution
Once you have your soap solution, you can apply it to your tile. If you have a spray bottle, you’ll spritz a small area, essentially breaking the job up into sections.
For the bucket method, take a mop you can wring out and dip it into the soapy water. Wring out excess water to prevent too much from sitting on your tile, then run the mop across a small flooring section.
Mop the Section
After applying the soap solution, use a mop to lift dirt, dust, and grime. Rinse the mop regularly, ensuring dirt isn’t just being spread across your flooring.
If you’re using the bucket method and are rinsing there or are using a bucket of clean water solely for rinsing along the way, make sure to change it out once it gets dirty. Otherwise, you’re potentially putting dirt and dust back on your floor.
Repeat, Rinse, and Let Dry
Continue using the process above until you go over all of your flooring. Then, get a bucket of clean water and rinse the floor, removing any soap residue. Once that’s done, let your floors air dry.
2. Baking Soda

Make a Baking Soda Paste
This approach is far more labor-intensive, but it’s effective for tough stains on tiles that can handle an abrasive cleanser. Start with two cups of baking soda. Add in a little water, mixing until you get a paste.
Apply the Paste and Scrub
Once you have the paste, you’ll want to apply it to the stained tiles. You can use a sponge, toothbrush, or nylon cleaning brush.
With the paste on the tile, use moderate, even pressure and scrub the surface. The goal is to get up as much dirt and grime as possible and do some initial work on the stains. Once you have a good foundation in one spot, move to other areas of your floor.
Let It Sit
Baking soda can remove stains if left to sit. After scrubbing, leave the baking soda on your flooring for about 10 minutes.
Rinse and Dry
After 10 minutes:
- Get a bucket of clean water and a clean mop.
- Dip the mop in water.
- Wring it out.
- Use it to rinse the flooring.
Rewet the mop regularly, ensuring any dirt or dust you pick up along the way is off the mop. If the water gets dirty, pour it out and get fresh water. Continue that process until you’ve gone over the floor, then let it air dry.
3. Vinegar Solution

Make the Solution
Vinegar is great for breaking down grime as it’s naturally acidic. Plus, it’s a natural option and is generally safe for people and pets.
Generally, you can make the solution by combining one-part vinegar with one-part water. You can mix it in a bucket or go with a spray bottle if you prefer. Just ensure to avoid undiluted vinegar, as it can damage grout.
Spray One Section of Floor
After making your vinegar solution, you want to apply it to a small section of your flooring. Use as little as possible, as excess fluid isn’t great for any floor type. Plus, it slows drying times, which isn’t ideal.
Mop the Sprayed Section
Once the floor section is sprayed with the vinegar solution, use a mop to remove dirt and grime from that area. The mop you choose may depend on your floor type. For more delicate surfaces, you may prefer a microfiber mop.
Rinse and Repeat
As you work the first section, rinse the mop regularly to remove any captured dirt and dust. Then, you can continue working on that section until it’s clean. After that, move on to the next area, tackling your whole floor, then let it all air dry.
Ammonia Solution
Make the Ammonia Solution
 If your flooring isn’t base sensitive and you’re dealing with stubborn dirt and grim, an ammonia solution is worth trying. Generally, you’ll use a bucket and add ¼ cup of ammonia to a gallon of warm water, stirring to ensure it combines.
Dip and Ring the Mop
Since you have a bucket this time, you’ll want to use a mop type that you can wring out. That prevents excess fluid from ending up on your floor. Sponge versions may be best if you need some scrubbing power, and your flooring will stand up to it.
Dip the mop in the ammonia solution, giving it a moment to let some of the water penetrate the mop. Next, wring it out.
Work on One Small Spot
Since you’re applying the solution using the mop, you’ll need to work in small sections. Run the mop across the area, applying gentle pressure as you do. Avoid pressing too hard, as that can release a significant amount of water and may scratch your tile, depending on the material.
Continue Working in Small Sections
Once the first spot is handled, you’ll dip the mop again, wring it out, and continue to the next. If the water in the bucket starts getting dirty, dump it and make the solution again. Keep repeating that process until you go over the entire floor.
Rinse, Wipe, and Let Dry
With ammonia, you’ll want to rinse your floors with clean water once you’re done with the solution. You can use the same mopping process. Just make sure there’s only water in your bucket.
Next, you may want to use a clean, soft cloth or microfiber mop to wipe up any residue. After that, let the floor air dry.
High Gloss Sealer
Choose a Sealer
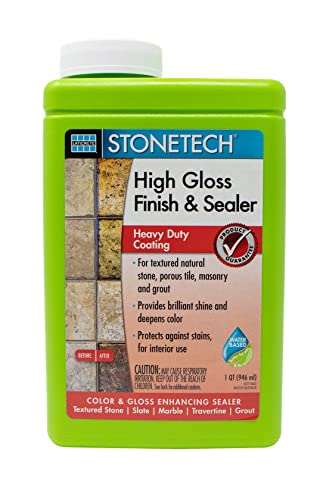 A high gloss sealer can restore the shine on practically any tile floor. However, not all sealers are designed for all flooring types. Additionally, some may have unique floor preparation requirements or could involve more risk.
Explore your options to see which tile floor sealer will give you the best result and is suitable for your flooring.
Read the Manufacturer’s Instructions
After you select a high gloss sealer, you’ll need to read the manufacturer’s instructions to ensure you get the best result. Most will require a clean, dry floor as a starting point.
Additionally, you’ll typically need to remove all furniture or movable items and get them off the floor. Otherwise, there will be spots on your flooring without sealer.
Beyond that, the requirements may vary.
Apply the Sealer
How you apply the sealer may depend on the one you’re using. Some have spray-on applications. Others require brushes or rollers.
In any case, you’ll want to use the manufacturer’s recommended approach. Also, make sure you apply a thin, even coat to your tiles, as too much sealer or uneven application will lead to poor results.
Let the Coat Dry
After you apply the first coat, let it dry. How long that’ll take varies between products, so refer to the manufacturer’s directions.
Apply Second Coat (if recommended)
Some tile sealers may require two coats. If the one you chose does, use the same process you did for the first one to apply the second.
Once it’s down, wait for the tiles to dry completely before walking across the tile. Some may be ready for light traffic in 12 to 24 hours, though it can take up to 72 hours before you can bring heavy furniture back in or use the area as you usually would, so keep that in mind.
How to Keep Tile Floors Shiny
After you do the work to restore the shine on your tile flooring, you’ll want to keep them looking spectacular. Here are some tips that can help.
Place Floor Mats Near Entrances
By having floor mats near entrances, you can wipe off your shoes before coming inside. That prevents dirt from getting tracked in, ensuring it doesn’t dull your flooring.
Just make sure you clean the floor mats weekly. That way, they’ll be more effective at capturing dirt.
Remove Shoes When Coming into the House
Another option for ensuring dirt isn’t brought in on shoes is to remove them before coming into the house. You won’t have to worry that trapped rocks, sticks, or other objects on the bottom will scratch your tile or sealer.
If taking shoes off outside isn’t an option, create a spot next to the door for shoe removal. You can put down a small rug and get some shelves to hold them, allowing you to have an effective shoe drop-off zone that will save your tile floors.
Vacuum with the Hard Floor Attachment
If you use a vacuum on your tile flooring, make sure to use a hard floor attachment or setting. This gives you better contact with the tile, improving suction and overall performance. As a result, your vacuum will do a better job at removing dust, dirt, and debris.
Clean Tiles Regularly
Since dust and dirt accumulation can make any tile floor look dull and dingy, regular cleanings are essential. Along with vacuuming or sweeping, map frequently.
How often you need to clean your tile floors depends on your unique situation. However, once a week is usually the longest you’ll want to wait.
Tackle Spills Right Away
Spills can be sticky, allowing them to trap dirt and debris once they dry on their own. Plus, some liquids may even damage your tile, grout, or sealer, causing your tiles to get dull faster.
If you spot a spill, wipe it up right away. A soft, clean cloth can work, as well as a mop. Make sure you rinse the spot with clean water, too, if there might be residue.
Avoid Wax
Many floor waxes may initially make your floors shiny. However, over time, the wax can trap dirt and debris. Plus, as the surface scratches, it can look dull.
Wax also builds up after every application, creating a thick layer that looks dingy. Since that’s the case, you’re usually better off avoiding wax if having a high gloss floor is a priority.
Should You Acid Wash Tile Floors?
Acid washing is a classic way to remove tough dirt and grime from certain hard surfaces. However, whether it’s right for your tile floor depends on a few factors.
First, certain stones are acid sensitive, including marble, travertine, limestone, and some granites. With those, an acid wash can lead to damage and discoloration, so it’s better to use another approach. Generally, you also want to avoid any acid-based cleansers when you’re dealing with porcelain tile.
Acid washes may also stain grout or damage grout. If your tile flooring has any grout lines, you’re better off using another option.
If your tiles are concrete, then acid washing might be worth considering. A stone that isn’t acid sensitive may also stand up to an acid wash. However, you’ll want to read the manufacturer’s label and instructions to determine what surface types it’s approved for, as whether it’s a good match for your flooring can vary.
It’s also important to note that acid-washing tile floors is typically a last resort. It’s complicated to use and potentially hazardous. As a result, try other methods first and only go this route if you have a compatible tile type and stains that won’t come up any other way.
Can You Make Matte Tiles Glossy?
If you have matte tiles and want to give them some shine, that is an option. You’ll need to use a tile sealer with the amount of gloss you’re after. For example, if you want a lot of shine, go with a high gloss sealer.
Using a tile sealer isn’t challenging, as the process listed earlier in the article shows. For the best results, make sure the floors are incredibly clean and completely dry before you begin. Beyond that, follow the manufacturer’s instructions to ensure a proper application.
What’s the Best Way to Shine Tile Floors?
In the simplest sense, the best way to shine tile floors is to clean them thoroughly. It’s usually best to start with the soap and water or vinegar options, moving on to baking soda, with ammonia being the final choice. Then, consider using a high gloss sealer to take the shine up a notch and protect your tile.
Did you learn everything you wanted to know about making floor tile shine? If so, let us know in the comments section below. Also, if you know anyone struggling to make their tile floors shine, please share the article.